Dan Friedman
Voice Over Coach & Demo Producer
828.551.0891
[email protected]
  • Home
  • About
  • Demos
  • Coaching4VO
  • Books
  • Services
  • Testimonials
  • Sound4VO Blog
  • Merch
  • Contact

voiceover recording

Voiceover – Tips and Tricks for Audio Production

May 3, 2016 by Dan Friedman

logo 4vo

By Dan Friedman with contributors Dan Gustafson and Cliff Zellman

Let’s talk … audio production. While it is easy for a voice actor to think only of their performance and delivery of the copy, it is also important to remember that all of those beautifully spoken words are pieces in a larger audio landscape. For those interested in producing and mixing, or for those VO talent interested in a glimpse into the world of sound design, this post is for you. I’ve offered up a few tips about audio production and asked a few friends to contribute as well.

Check it out and if you have any tips, feel free to leave a comment.

My longtime friend, producer Dan Gustafson of Sonicbliss Productions, (Have you ever noticed how many guys named “Dan” work in this business? Weird.) recently produced my radio imaging demos. He did such a stellar job that listening to my Active/Alt Rock Imaging Demo actually makes the hair on my arms standup. Here he offers some of his production and mixing tips.

Panning, Pitch Adjustments and EQ:

If I’m trying to create a snowball fight scene I’m going to need a lot of elements. Snowballs flying, snowballs hitting things, crowd noise, outdoor ambience, peoples reactions to getting hit with a snowball etc.
The way I would approach this is, for all the various snowball impacts I would use a pitch plugin and pitch them differently so they all sound individual. Then pan them all over the place. One could be panned left to 34, another could be panned right to 57, another could be panned left at 72, another could be panned right at 99 one could be right down the middle in mono. The stereo spectrum we have to play with is so huge, take advantage of it.
In terms of EQ, carve out a space for each item. If I have a track of crowd noise and a track of outdoor ambience on top of each other, I might do a cut at 1800k on one track and a boost at 1800k on the other track. The frequency range can be whatever sounds good to you, the boost one and cut the other is the important thing.

VO Performance:

The best VO talents can take the worst piece of copy in the universe and make it sound compelling. How? Silence, inflection, dynamics and changing pace/intensity.
I think silence is huge but you need to be lucky enough to have copy that gives you room to breathe for that to work.
In terms of inflection, after you’ve read it a few times the way you “think” it should be read, try reading it with totally different inflections, energies and emphasis. It could sound horrible, but, you may find a gem take in there or something that leads you down a different path. These are the things that would help a VO talent stand out in a crowd of thousands.
When it comes to dynamic range, maybe think about a great song. It isn’t all in one dynamic range, it has soft parts and loud parts to emphasize certain points. Spot copy should be treated the same way in my view.
And how exciting is a movie trailer or song when it starts out slow, begins to build in speed and intensity, then hits a crescendo. Change of pace can build drama and that means a compelling piece.

Fine Tuning:

I had a boss once who told me, “Getting it to 95% could take you an hour, but then trying to get it to 100% could take another 3.” That made so much sense to me. As artists, we want everything to be perfect, but 95% of your best effort infused with the passion you bring to the mic every day is going to produce a great piece of work.

I met Cliff Zellman in 2011 and we immediately became good friends. We share similar points of view on nearly everything audio related. Cliff is a grammy winning producer who works in the fast paced world of automotive commercial production through the Texas based company Radiovision.
.

Mixing VO with music and sound effects:

I try to carve out the center of the mix a bit, leaving plenty of room for the VO in the middle.  I listen for dominant frequencies within the center of the stereo music bed and drop them slightly using a good stereo-linked parametric EQ. Then I use a touch of side-chain compression on the music bed, using the voice as a trigger. Just a touch, maybe -1 or -2 db.

Reading for an audition:

Imagine what the visuals might be doing. Some scripts may have a column for video direction, but most audition scripts won’t. Look for clues in the script. Let the casting director know you understand the “layers” of the script.

Keep it clutter free!

Working in a clutter free environment is much more conducive to creativity then working amidst chaos. Less distractions can keep you in that “creative zone” easier and longer. This also goes for your computer’s directories and files. Just remember KICK (keep it clean, kid).

When mixing demos, commercial spots or working on audio productions of any kind here are some tools that I use as well as some things that I keep in mind:

Layering:

Layers of sounds are critical in audio production as we do not live in a world where only one sound at a time is occurring. Taking environment and sound location (left, right, up, down, forward, back) into consideration are critical to creating a realistic environment. Always listen to the world around you, so you can recreate that world more accurately in audio production.

For drama, sounds such as an explosion (for example) are usually not simply an explosion sound effect. They are far more exciting when multiple layers of sounds are brought together. An audio explosion might include an impact sound, the reflected concussion from the impact,  the sound of the low end boom and trailing rumble and perhaps even a subtle musical drone may be layered together to create a dramatic … BOOM!.

Timing:

The seventh dimension of recorded sound is time. Frequent changes in dynamics, tone and pacing hold the listener’s attention and make listening entertaining and fun.

Set limits:

Artists of the past were forced to come up with creative solutions because they were limited by the technology of the time. Now that computers make nearly anything possible in the audio realm, it is important to set limits and know when to call a project “done.”

Audio production requires practice, experimentation, a proper listening environment … and is one of the most fun and creative aspects of this business.

If you have tips, tricks, questions please leave a comment below.
Filed Under: Audio Production Tagged With: 4VO, audio engineers, Audio Production, Cliff Zellman, Dan Friedman, Dan Gustafson, demos, Recording, Sound Advice Voiceover From an Audio Engineer's Perspective, sound4vo, VO, VO directing, voice over, voiceover, voiceover book, voiceover recording, voiceover talent

Voiceover – The New Catalog is Here!

February 24, 2015 by Dan Friedman

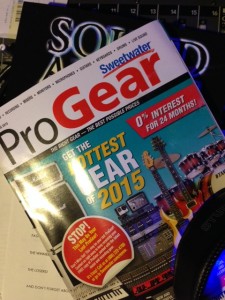
IMG_1791Other than checks and gifts there are few things that we in the voiceover industry receive in the mail that are quite as exciting as the ProGear catalog from Sweetwater. While I have made purchases with many retailers over the years, none of them offers a catalog quite as alluring as Sweetwater. The ProGear catalog is filled with plenty of photos and some really helpful tips on how to get the most out of the gear in your studio. The tech tips and Q&A interviews scattered throughout are worth much more than the weight they add to the catalog … and allow me to say that I don’t just get it for the pictures. 😉
(This year the Victoria’s Secret catalog arrived in my mail on the same day as the Sweetwater catalog. I scanned it thoroughly … twice … and found no helpful articles.)

If you are buying studio gear for the first time, want to upgrade and get the most bang for your buck, or simply have no interest in becoming a “techy,” then even the Sweetwater catalog (as sexy as it is … ahem, I mean informative) can be somewhat overwhelming. You just can’t try everything before you buy. So, how do you choose?

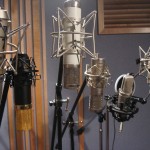
Just as we interpret scripts for meaning and subtext, we also have to interpret descriptions of the gear. For instance, if a microphone has a description that includes “vintage sound” that microphone probably has some characteristics that are noticeable or recognizable. This should probably be interpreted to mean that the microphone, although it may sound spectacular on many sources, may not capture our voice as purely as we would prefer. The microphone will have its own sonic character. A description that includes “accuracy” or “clean and clear” may be the better choice.

A microphone’s description may include the acronym “SPL” (Sound Pressure Level). This means the loudness level (or volume) of the source sound (e.g. – your voice). While we are not necessarily shouting, we may be close to the microphone for intimate reads. As such, the microphone may still be receiving a fairly significant amount of sound pressure level at close proximity. A microphone’s ability to handle high SPLs without distortion is important to us as voiceover artists.

The descriptions included with interfaces and preamps are filled with hyperbole. Once again, terms such as “accurate” and “clean” will be words to look for. Many of us work with multiple DAWs (Digital Audio Workstations) and travel with our gear, therefore “flexibility” and “portability” are terms to watch for as well. Preamps/Interfaces are easy to return or exchange if they don’t offer the level of quality you are hoping for. (Due to health concerns, exchanging microphones can be a bit more complicated. Be sure to check with your retailer regarding their return policies). Furthermore, you will often find another similarly priced preamp/interface from another manufacturer that will.

Truth be told, if you were recording an instrument with a broad range of frequencies such as a piano or recording an entire orchestra, the overall ability of your interface to capture those sounds would be critical. Your voice takes up much less sonic space. At the low end of the price spectrum you will not notice too many differences in an interface’s ability to capture sound (or differences listed in the catalog). However, there are a few areas where you will notice significant differences. One of the things that separates good quality gear from gear that is barely acceptable (or not at all acceptable in my opinion) is the sensitivity of the knobs. Small changes to the preamp on a physical knob should not cause dramatic jumps in signal level (up or down). Level changes should be as smooth as the knob you are turning essenceapotek. Another difference is headroom, or the ability of the preamp to produce an adequate signal level while still allowing you to increase the gain should you need it. Other critical differences are self-noise and the software and interface options they may or may not offer.

For studio monitors it is important to remember that you are working primarily with your voice. Therefore it isn’t necessary to have features such as “extended bass response.” Be sure to pay attention to whether the studio monitors are “powered” or “active.” This means they have their own amplifiers built into the speaker enclosure. Remember, the size of your listening environment will help determine what size studio monitors will best meet your needs. If you are going to be using your speakers in a small space, then “nearfield” monitors are the way to go.

Just like with studio monitors, headphones may offer a number of features you simply do not need when working with voice alone. However, there are some features you will definitely want to consider. A closed back design is one of those must-have features. This design helps reduce the possibility of sound being emitted by your headphones from leaking into your microphone. Headphone bleed is a sound you do not want to have to try to edit out of your recordings later. You’ll also want to be certain that the headphones you choose are comfortable as you may be wearing them for an extended period of time.

Hopefully, some of what I’ve shared here will start you on the right path. Clearly, every description is intended to influence you to buy. We can do our best to interpret greater meaning within these descriptions, but in the end, it will always come back to listening for yourself. Above all else, no matter what piece of gear you choose or which retailer you choose to purchase from, there is no substitute for a stellar performance and a great sounding recording environment.

Thank you Sweetwater for producing a catalog that is loved by everyone in our industry!

Filed Under: Studio & Gear Tagged With: 4VO, Dan Friedman, home studio, ProGear, Recording, Room acoustics, Sound Advice Voiceover From an Audio Engineer's Perspective, sound4vo, Sweetwater, VO, voiceover, voiceover book, voiceover recording, voiceover talent

The Anatomy of Three Voiceover Home Studios Part 3

April 4, 2013 by Dan Friedman

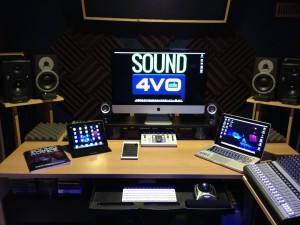
SOUND4VOStudio It is as simple as this… if you want to work in voiceover, you need a home studio. I know it seems hard to believe, but it is true; the days of being chauffeured around from studio to studio where you talk for a few minutes and line your pockets with cash are long gone… and have been for years. More recently, the need for racks filled with expensive magic audio boxes has also become unnecessary. Today, with nothing more than a USB microphone and an iPad, you can be recording high quality audio in no time. Well… sort of.
In this final installment, of the three part series(part 1) (part 2), I’ll discuss a third type of voiceover recording setup. In this setup… the sky is the limit! Keep in mind, that in any recording setup, there are at least two common denominators that will remain constant. They are, and always will be, the two most important factors in your sound and your success… you and the space in which you record. The cheapest setup can sound great (or at the very least… useable) with an amazing talent, performing in a great sounding space. A great performance on expensive equipment can be useless in a noisy or terrible sounding space.

With that in mind, let’s checkout setup number three.

Voiceover Recording Setup 3

While setup 1 and setup 2 are portable, portability was never the goal. Consistency from one session to the next is a critical element to success in voiceover. Therefore, remaining in one space is preferred. Recording setup 3 is stationary, and there are other big changes that will have you prepared for anything. One of the biggest changes is incorporating a mixer into the setup, which will allow you to include phone patch and (when you are ready and if the technology is available where you are geographically) an ISDN codec.

I could very easily have added them to the other two setups but with setup 3, the other big change is the necessity for studio monitors (speakers). Nobody should be listening critically to audio on headphones alone. Headphones, by design, do not give you a true picture of how we hear sound in the real world. We hear with both of our ears in combination, not with the left and right sides in isolation. Studio monitors are a personal preference. Whichever monitors you choose, you should give yourself some time to get familiar with their characteristics. More importantly, they should be comfortable for you to listen on over long periods of time.

Most components listed in setup 2 will remain the same for this setup. Instead of a laptop, a desktop computer will serve as the focal point for this studio. This will likely increase your storage capacity and speed. It will also give you more visual real estate due to a bigger computer monitor (the screen) and you can get even more real estate by adding an additional monitor.

With this setup, the sky is the limit when it comes to options, components and prices. Upgrades are possible in all areas of your audio chain. While the $300 microphone may still be perfect for you, it may be worthwhile to explore more expensive options. The same is true for your preamp, interface, cables and… well… everything. The price ranges I’ve listed below, now reflect the cost of higher priced equipment that can be found in many home voiceover studios.

Overall estimated cost:

High quality desktop computer w/OS and basic software – $1500 – $3000
DAW – $0 – $1800 (Audacity and “lite” DAW software = $0, full versions = $1800)
Separate Preamp – $500 – $2500
USB/Firewire Preamp or standalone AD/DA Converter – $150 – $2500
Mixer – $100 – $1000
Standard (XLR) LDC microphone – $300 – $1200
ISDN Codec or Source Connect Pro Software – $1000 – $3000
Phone patch – $175 – $500
Headphones – $100
Studio Monitors – $300 – $1600
Cables/adaptors – $50 – $200
Heavy duty microphone stand w/boom – $150

Setup 3 cost = aprox. $4325 – $17,550

Your home studio. For just over $1000, which was discussed in part one of this series, all the way up to over $17,000 (and beyond) you can be recording, editing and producing voiceovers. Note that these costs don’t take into consideration acoustic treatment or sound proofing (the prices for Whisper Rooms, for example, begin at just over $3000). Furthermore, if you’re interested in doing full production and mixing, you’ll need music, sound effects and audio processing plugins to go along with your DAW software.

Some of the items listed can be combined and many of the items are transferable from setup to setup, allowing your studio to build upon itself and grow with your career. Also, it is more likely that setup 1 could be the last setup you buy rather than your first. The portable studio is far more useful to voice talent who’ve been working at this awhile and are in higher demand.

So, now that you’ve gotten your studio budget figured out… start working on your budget for coaching, marketing materials, website, travel to industry events and your very own… chauffeured limousine. 😉

Filed Under: Studio & Gear Tagged With: Dan Friedman, home studio, sound4vo, voiceover, voiceover book, voiceover recording

The Anatomy of Three Voiceover Home Studios – Part 2

March 8, 2013 by Dan Friedman

It is as simple as this… if you want to work in voiceover, you need a home studio. I know it seems hard to believe, but it is true; the days of being chauffeured around from studio to studio where you talk for a few minutes and line your pockets with cash are long gone… and have been for years. More recently, the need for racks filled with expensive magic audio boxes has also become unnecessary. Today, with nothing more than a USB microphone and an iPad, you can be recording high quality audio in no time.

Well… sort of.

In this installment, of what will be a three part series, I’ll discuss the second of three types of voiceover recording setups. Each setup will cover reasonable price ranges that will, at a minimum, be capable of providing an acceptable level of quality as well as varying degrees of flexibility. A professional working voice talent could easily own all three of these setups at different points in their career, or even use any one of the three interchangeably with the other two. With proper planning, the smallest, most portable and least expensive setup can easily grow with and become an integral part of the most comprehensive and expensive setup.

While these setups are different, there are at least two common denominators that will remain constant. They are, and always will be, the two most important factors in your sound and your success… you and the space in which you record. The cheapest setup can sound great (or at the very least… useable) with an amazing talent, performing in a great sounding space. A great performance on expensive equipment can be useless in a noisy or terrible sounding space. Keep that in mind as we explore the following VO setup.

Voiceover Recording Setup 2

For recording setup two, rather than going with a tablet (which was discussed in The Anatomy of Three Voiceover Home Studios Part 1), choose a high quality laptop computer.

Personally, I believe that this setup is the one everyone needs at a minimum. The tablet based recording studio is very limited when it comes to choices and flexibility. Going with a laptop, rather than a tablet, opens up a world of possibilities. With a laptop computer you’ll get far better: storage capacity, ease of use, compatibility with hardware interfaces, including both USB and firewire, and access to most all of the DAW options (depending on which OS you choose). The flexibility alone is well worth the additional cost. The computer is the foundation of your studio. So, no matter what level you are at, spending the most money here is always well worth the added investment.

When using a full featured computer, the world of available interfaces increases dramatically. You can use USB interfaces or upgrade to the faster firewire or thunderbolt options. Most interfaces in this category offer preamps and phantom power, and many have multiple preamps. For this studio setup, I’ll assume that you’ll still want to keep it portable. Therefore most of your options will fall between $150 and $750.

Having at least two inputs on your preamp/interface allows you to add another key component to your studio… the phone patch. The phone patch allows you to pipe in a client/director to your headphones and receive direction live during a session. Most phone patch devices are designed to work with land lines but the JK Audio Daptor 2 works with cell phones. This is a bit more practical since many people are abandoning their land lines.

While recording, even on a powerful laptop, it is good practice to close other applications on your computer and use only those that are most critical to getting the job done such as your DAW, interface control panel, etc. Its not recommended that you surf the internet, talk on Skype and manipulate Excel spreadsheets while simultaneously recording audio (like you would want to work on a spreadsheet… HA!). Attempting to multitask in this way is not only difficult for you, but can make it possible for erroneous sounds, possible anomalies and errors to sneak into your recordings. For this reason, it is still very useful to add a tablet into your studio setup.

With a tablet, there are many useful apps that you can easily incorporate into your workflow including apps for reading and editing scripts (no more paper), timers/stopwatches and communications apps such as Skype. Perform these peripheral tasks on your tablet while recording and editing on your laptop.

Besides being far more flexible and overall easier to use, there is also at least one area for cost saving that is available by choosing a laptop. While a comprehensive and full featured DAW is recommended, Audacity software is FREE and available for both Mac and PC. Compared to most DAW’s, Audacity is a bit “clunky” in its operation. But, it is capable of doing most recording, editing and even processing tasks that are important to a voice talent. Another consideration is that many hardware interfaces come packaged with DAW “lite” versions. Not only are they capable of performing critical recording and editing tasks, they are also a great introduction to the full versions of the software.

Itemized estimated costs:

High quality laptop w/OS and basic software – $1200
DAW – $0 – $500 (Audacity and “lite” DAW software = $0, full versions = $500)
USB/Firewire PreAmp-AD/DA Converter – $150 – $750
Standard LDC microphone – $300
Phone patch – $175
Headphones – $100
Cables/adaptors – $50
Heavy duty microphone stand w/boom – $150

Setup 2 cost = aprox. $2125 – $3225

Add a tablet for an additional $550 (If you started with setup one and are adding components… you’ll already have a tablet).

In the final installment of this three part series, the sky is the limit! I hope you’ll check it out.

Filed Under: Studio & Gear Tagged With: Dan Friedman, home studio, sound4vo, voiceover, voiceover book, voiceover recording

Voiceover Processors – Hardware vs Software Revisited

October 11, 2011 by Dan Friedman

There is a lot of talk about mic modelers in social media today. A while back, I was asked the question in regards to voiceovers, which processors (i.e.- compressors, EQ, etc.) are better: hardware or software? Well my answer to that question, also applies to mic modelers. The tools available in both formats have advantages and disadvantages. While nothing can truly substitute for the real thing, this doesn’t mean that a simulation can’t be useful, effective or even very good. Whether we are talking about microphones or other audio processors, there are hardware models that sound great and perform exceptionally well, and then there are some that do not. The same is true for software versions.
Consistency is critical in voiceover work, so a clean unprocessed signal during recording is usually ideal. As a voice talent you generally will not, or should not, be using processors when recording, and if you are it should be very minimal and the same every time. Therefore, you really don’t need a great deal of choices.

If you are a voice over talent working from your home studio, chances are that software versions will be your best or maybe your only option. Besides not really needing many choices, it just doesn’t make financial sense for someone who only does voiceover work to own a vast array of microphones, hardware or rack gear. When considering processors, hardware boxes will take up valuable space in what are often small spaces to begin with. Another downside is that they give off a great deal of heat (especially tube gear) making tight spaces more uncomfortable.

Does hardware sound better than software? Not necessarily. As an engineer, I would love to have full racks of hardware options at my disposal. Each helps to create different sounds, characteristics and textures within a mix. But would having racks of gear stop me from using software versions? Not likely.

Software versions of processors perform the same functions as their hardware counterparts, and like their hardware counterparts, they also have different sounds, characteristics and textures of their own. These characteristics vary from processor to processor in software versions just as they do in different brands and types of hardware. Software versions meant to emulate specific models of rack gear can come very close to capturing that hardware sound. But they will still have their own sound and character that make them different, not necessarily better or worse, than the hardware they emulate.

If it is great sound as well as a variety of sounds you are going for, then having both hardware and software is the way to go. However, if your space and budget are limited, then having a variety of software versions will probably be just fine for your needs. The bottom line is this, whether your processing options come from hardware or software, the tools are only as good and as effective as the person using them. Get the best sounding tools you can afford, learn how to use them and most importantly… use your ears.

Filed Under: Audio Production, Studio & Gear Tagged With: 4VO, Dan Friedman, Sound Advice Voiceover From an Audio Engineer's Perspective, sound4vo, VO, voiceover recording

Audio Terms and Definitions

May 3, 2011 by Dan Friedman

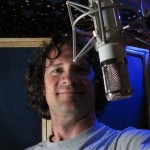
Dan Friedman, microphoneGood communication is a key to success in all relationships. Often miscommunication and misunderstandings between people occur because they simply don’t know how to “speak the same language”. I’m not talking about the difference between English and Chinese. I’m talking about technical audio terms. In the business world, nearly every type of business, has a name for everything they do. The recording and voiceover world is no different.

In an effort to overcome the “language barrier” that often exists among engineers, directors, clients and talent, my friends and I have put together a glossary of voice over studio terms that everyone in this business should know.

While individual studios and production companies may also have unique terminology that is used internally, this list will provide you with key terms that are fairly universal throughout the industry.

Enjoy!

AUDIO TERMS and DEFINITIONS

ADR – (Automated Dialog Replacement) Also referred to as ʻloopingʼ. The process of replacing a voice over for an on-camera talent.

Compression – The use of an audio processor to control audio dynamics (loudness and softness) on a piece of audio. It can be arcoxia 90 applied to individual parts as well as to an overall production.

Data compression – Process designed to reduce the transmission bandwidth requirement of digital audio streams and the storage size of audio files.

De-breathing – The process of removing all breaths from a vocal performance.

Editing – The process of removing unwanted portions of audio, leaving only the portion that will be used in the final production. May or may not include de-breathing.

Equalization (EQ) – The use of an audio processor to manipulate the frequencies that exist within all sounds heard by the human ear.

Audio File Formats – Common uncompressed audio file types used in audio production are: AIFF & WAV. Compressed audio files are typically MP3.

ISDN – Integrated Services Digital Network – A communication standard allowing the transmission of voice (as well as video and data) from one studio to another over telephone lines in high speed, digital quality and with great fidelity.

Limiting – The use of an audio processor to keep audio from exceeding a certain level or threshold as determined by the engineer.

Maximization or Maximize – A mastering process that includes the use of an audio processor to bring audio up to a maximum level as determined by the engineer.

Mix – A fully produced, finished or broadcast ready audio presentation that may include voice, music, sound effects, all necessary processing and maximization. Usually provided in stereo unless the final format is mono only (such as a phone system)

Mixing – The process of manipulating and combining multiple audio signals or elements to create a final audio production or mix.

Noise – Any sound that is undesirable or unwanted.

Normalize – To increase or decrease audio levels to a fixed point based on the peak point or RMS equation.

Processing – Any alteration of raw audio through the use of audio tools such as compression, equalization (EQ), maximization, or time- based/space-based effects (i.e. – delay or reverb).

Raw Audio – Any recorded audio that is unedited and unprocessed. Delivery of “raw audio” means to provide clients with audio exactly as it was recorded.

Reverb – A space/time based effect that simulates an environment. All environments have an effect on a sound within that environment.
Example: A voice heard in a stadium sounds different than a voice heard in a closet. Reverb can be used to simulate the sound of both environments. Some people refer to this as “echo” (IMPORTANT NOTE: the use of reverb is very dependent on an overall production and therefore is rarely added unless a full mix is being produced).

Sample Rate/Bit Rate – Essentially the amount of digital information used by the computer in the creation of an audio file. The higher the rate, the higher the supposed quality of the file. However, beyond a certain point (for most people above 44.1kHz/16 bit) the difference in sound quality is undetectable. Therefore, the need to obtain/verify this information becomes necessary primarily for compatibility among files or systems.

44.1kHz/16bit = CD quality audio

48kHz/16bit = Video standard for audio

Slate – A recorded audio cue that identifies the audio that follows. Generally stated as, “take one (followed by the recorded VO), take two (followed by the recorded VO) take three…” etc.

Stems – Individual elements of a mix provided separately. Voice, music, and sound effects provided as separate files instead of combined in a full mix.

Takes – A separate file of recorded audio. Each take is identified by a separate file name and a slate.

Time Compression/Expansion – An electronic process using an algorithm which leaves the pitch of the signal intact while changing its speed (tempo)

Filed Under: Audio Production, Voiceover Tips & Advice Tagged With: 4VO, home studio, Recording, Sound Advice Voiceover From an Audio Engineer's Perspective, sound4vo, VO, voiceover, voiceover book, voiceover recording

Primary Sidebar

Search Blog

Categories

Want to see how well we work together first? LET’S DO IT!!

Book a Single Session
Book a FREE Meet & Greet

Follow Sound4VO

Dan Friedman Voice Over Coach & Demo Producer Tiktok

Tip Jar

Have questions on anything related to voiceover? Dan is available for email consultations at no charge. Ask away! If he's able to help you with your problem, tips are greatly appreciated... Use the "tip jar" below to show Dan the love!

Dan Friedman Voice Over Coach & Demo Producer Tiktok

[email protected]

828.551.0891

Dan Friedman Voice Over Coach & Demo Producer Zen and the art of Voiceover Audiobook Cover Img
Buy Now
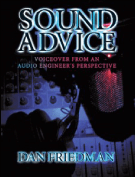
Dan Friedman Voice Over Coach & Demo Producer Sound Advice Cover Img
Buy Now

RLM CERTIFIED MASTER COACH Since 2021

Dan Friedman Voice Over Coach & Demo Producer RLMC Logo

©2025 Dan Friedman Sound4VO // Voice Over Site by Voice Actor Websites

MENU
  • Home
  • About
  • Demos
  • Coaching4VO
  • Books
  • Services
  • Testimonials
  • Sound4VO Blog
  • Merch
  • Contact