 It is as simple as this… if you want to work in voiceover, you need a home studio. I know it seems hard to believe, but it is true; the days of being chauffeured around from studio to studio where you talk for a few minutes and line your pockets with cash are long gone… and have been for years. More recently, the need for racks filled with expensive magic audio boxes has also become unnecessary. Today, with nothing more than a USB microphone and an iPad, you can be recording high quality audio in no time.
Well… sort of.
In this installment, of what will be a three part series, I’ll discuss the first of three types of voiceover recording setups. Each setup will cover reasonable price ranges that will, at a minimum, be capable of providing an acceptable level of quality as well as varying degrees of flexibility. A professional working voice talent could easily own all three of these setups at different points in their career, or even use any one of the three interchangeably with the other two. With proper planning, the smallest, most portable and least expensive setup can easily grow with and become an integral part of the most comprehensive and expensive setup.
While these setups are different, there are at least two common denominators that will remain constant. They are, and always will be, the two most important factors in your sound and your success… you and the space in which you record. The cheapest setup can sound great (or at the very least… useable) with an amazing talent, performing in a great sounding space. A great performance on expensive equipment can be useless in a noisy or terrible sounding space. Keep that in mind as we explore the following VO setup.
Voiceover Recording Setup 1
The first setup is the most basic and least expensive. It isn’t the most convenient to use as a permanent solution but, if you are on a really tight budget, this setup will be enough to help you get your feet wet. If all goes well, this setup could someday be used as your remote recording rig. It consists of a tablet (or iPad) with recording software and USB microphone (option 1) or large diaphragm condenser (LDC) microphone and a separate USB preamp combined with an AD/DA (analog to digital/digital to analog) interface (option 2).
Recording and editing capability as well as the ability to send large files is critical. On your tablet, you’ll need to install a DAW (digital audio workstation) such as Twisted Wave, Auria, Cubasis or another highly functional DAW. You’ll also need dropbox or a similar application to store and transfer your files. While there are free recorders listed in the app store, Twisted Wave is only $9.99 and when compared to the questionable reliability and capability of the free apps, it is well worth that small price. For even more capability, Auria and Cubasis are near full functioning DAW’s at a cost of around $50.
The most important considerations with any of these apps, and this setup, is compatibility with your hardware. More specifically the USB microphone and/or USB interface you intend to use. It is important to research which interfaces are known to work (or not work) with the various DAW’s and also whether the tablet itself is capable of working with these devices. Keep in mind you may also need additional adaptors to connect everything. In the case of the iPad for example, a USB adaptor is needed to plug in a mic or interface.
Itemized estimated costs:
– Tablet/iPad – $550
– DAW – $10 – $50
– (Option 1) High quality USB microphone – $200
– (Option 2) USB preamp-AD/DA converter – $150 + LDC microphone – $300
– Headphones – $100
– Cables/adaptors – $50
– Heavy duty microphone stand w/boom – $150
Setup 1 Option 1 cost = aprox. $1100
Setup 1 Option 2 cost = aprox. $1350
Option 2 is the preferred option because it allows more possibilities for future growth and offers many more options when choosing a microphone that works well with your voice.
While this setup is highly portable, simple to use and reasonably priced, for just a few hundred dollars more you can seriously increase your capability and flexibility .
I’ll discuss setup number 2 in my next installment.
For more on sound and studio equipment for voiceover, check out: SOUND ADVICE – Voiceover From an Audio Engineer’s Perspective

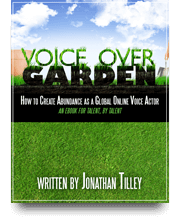 Happy new year everyone! To begin 2013, I’d like to show a little love for a fellow VO author. I’ve been reading Jonathan Tilley’s new book
  Last year, my experience at the New York Voiceover Mixer was quite a journey. A

