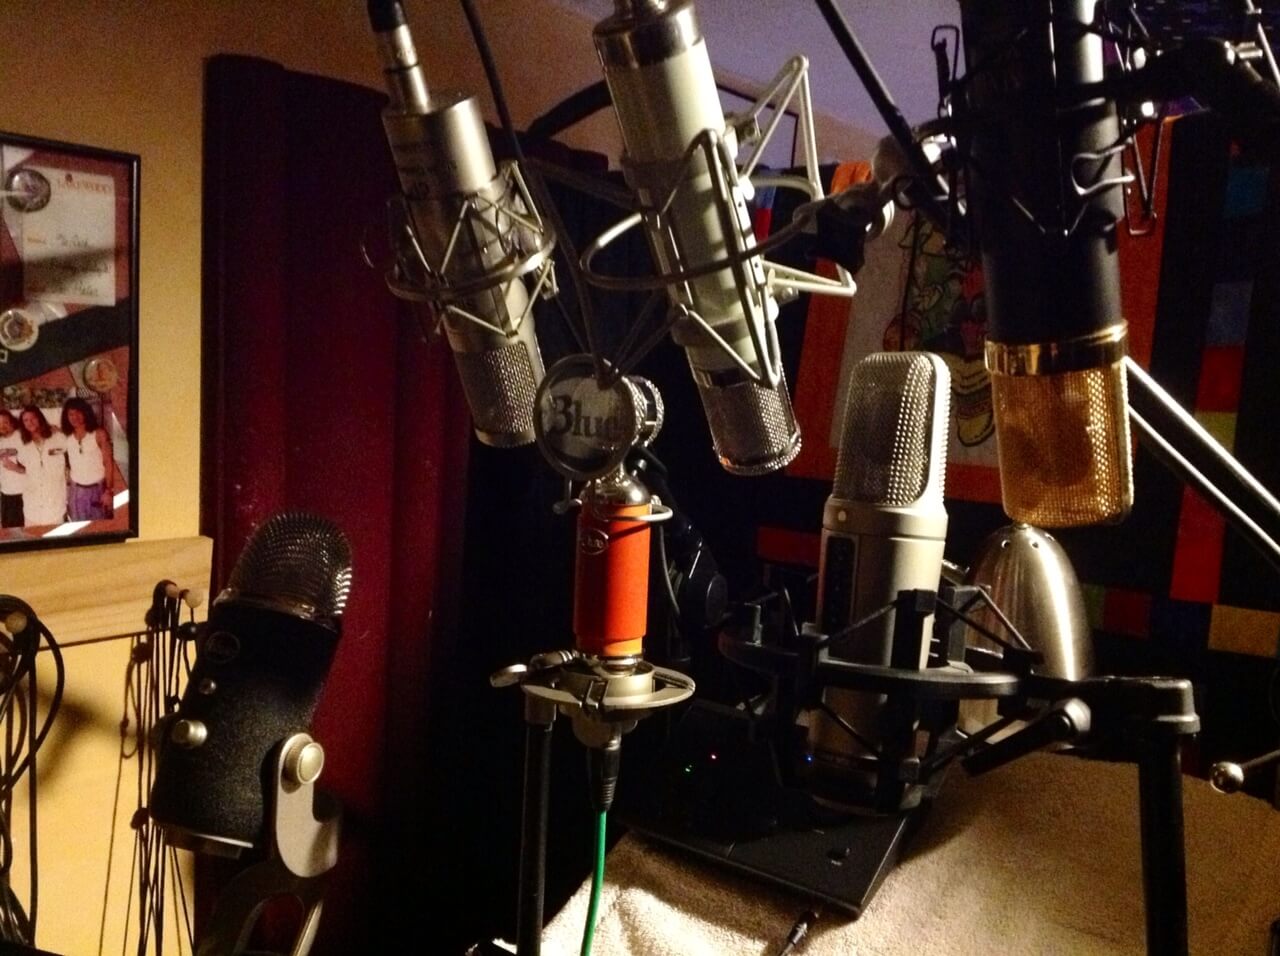
 By Dan Friedman Choosing a Voiceover Microphone.
As a voiceover artist, it is critical that you choose the right microphone for your voice, your room and your budget. When it comes to determining which microphone is right for you, there is only one good way to go about making this very important decision.
Before buying anything, YOU MUST LISTEN AND COMPARE FOR YOURSELF.
Typically, when voice talent begin their career or begin to invest in a home studio they choose a microphone based on one or more of the following: advice from friends or associates, familiarity with something they’ve used previously (perhaps an Electro-Voice RE20 from a radio station), what the sales person at the music store sells to them, or what they can afford. Although all of these factors should be taken into consideration, they serve as merely a starting point.
The advice of others is helpful, but how good something sounds to one person (or on one person’s voice) may not be as good for someone else. The best way to use the advice of others is to list all of the microphones they mention as possible options. For those who have had experience in broadcast, it is important to note that although those RE20’s and Shure SM7’s are great in radio stations for their sound and their durability, they are not necessarily the best choice for voice overs.
Of course the advice of a salesperson should always be “taken with a grain of salt”. They may be very knowledgeable, but they may also be getting incentives to sell you something that just isn’t right for your needs or your voice. Lastly, it is understandable that everyone wants to save money, but consider two things:
- Since this is your career, you want to sound your absolute best, and sounding your best should help you pay for your investment.
- If you do the research, you can still find the best microphone for you and your current situation.
The best advice will most likely come from the engineers you work most closely with. Engineers in the voice over industry often have the benefit of hearing many different microphones on many different voices. Not only do they know what they like, but they may also know your voice and the sound of your room well enough to know which microphones will work best for you. Also, if you are working with them closely already it may mean that you are already earning money with them and that is the best reason to seek their advice and make a decision that will help keep them happy with your sound. But even with all of that being said…
Nothing can replace the experience of actually testing several microphones and listening to the myriad of choices and sounds that different microphones offer. It is truly an ear opening experience.
It should be noted that there are several microphones that are considered voice over industry standards and the only reasons to not choose one of them are: 1) if you absolutely can not afford them or 2) if they do not sound as good on your voice as something else. For voiceovers or voice acting, the Neumann U87, TLM 103 and Sennheiser 416 are industry standards because of their well known characteristics and sound quality. Therefore, engineers and producers generally prefer to work with these microphones.
If you either can not afford one of these microphones or they are just not working well for you, here is a plan that should help you find the best microphone for you and your situation. As a general rule, a large diaphragm condenser microphone will likely be the most appropriate choice as a voice over microphone. There is an enormous selection of LDC microphones available and they range in price from below $100 to up into the thousands of dollars.
Begin by making a list of microphones, and noting which ones fit your budget. Include at least one industry standard microphone (you will use this to compare others against). Start your list with all of the microphones that have been suggested to you. Read through descriptions of other microphones in music store catalogs, websites, industry blogs and forums. If you are serious about your career, you will not limit yourself to just the cheap ones. Remember, the idea is to find the best microphone for you and although you may not be able to afford “the best one” now, you will at least know what that is and may be able to get it later. Make no mistake, among inexpensive microphones there are some great values available and one may even be perfect for you.
If you are reading the specifications for microphones (and you should be) look for words and phrases such as: high signal to noise ratio or low noise, capable of withstanding high sound pressure levels or SPL, wide dynamic range, sonic clarity and transparent signal.
Note whether a particular model is generally used for vocals or instruments. Also pay attention to what accessories may be included in the price.
I strongly suggest using a shockmount. A shockmount is a “basket” that holds a microphone. It is designed to help eliminate vibrations that can reach the microphone through the microphone stand. Some microphones include a shockmount, for others it must be purchased separately.
After you’ve done your research, have made a list of microphones that interest you and that fit your budget, it is time to visit a music store with a pro audio department. Even if the nearest one is far away, it would be worth making the trip. This is your sound and your career we are talking about!
Bring along at least 3 scripts. Bring a high energy script that requires you to push your voice a bit, bring a script that matches the style you perform the most and bring a script that requires a close and intimate read. You may also consider including a script that contains several hard consonants such as “t” or “p”. When you get to the store let a salesperson know that you would like to test and compare some microphones. You will need to be setup with a mixer, a microphone cable and some headphones. Of course if you already have headphones that you are familiar with you should bring your own. If you can find a quiet area within the store, it would be best if you can use that space for your tests.
Ask for one of the industry standard microphones – you will want to keep this around to refer back to as you try others. Using the same exact audio chain and settings begin testing your reads through each of the microphones on your list (remember to turn the phantom power off and back on as needed when switching microphones). For this test you will want to have your headphones reasonably loud, but not so loud that they damage your ears. The idea is to listen closely to the nuances in the microphone. Do not worry about your read.
Use your ears and ask yourself the following questions as you listen. Listen to the high end. Is it crisp and clean or is it smeared? A “smeared” high end has the sound of being distorted, where “s” seems harsh, brittle and possibly almost painful. It sounds as though there is just too much of it and the sound doesn’t end cleanly. Is there not enough in the high end? Does your “s” seem to disappear or sound dull? Listen to the midrange. Is your voice coming through clearly as you know it, or does it sound affected? Does it sound a bit like it is coming through a telephone or a megaphone? Is the midrange seemingly harsh or is it seemingly dull or distant. Ideally, it should sound…the way you really sound. Listen to the low end. Particularly if you are a deep baritone, pay attention to how the deepest part of your voice is translating. The low end can be distorted in much the same way “s” can be distorted in the highs, except the lows will sound too thick or “muddy”.
How are the “t” and “p” consonants coming out? Is the microphone popping easily on these consonants? How does the microphone react when you change your proximity to it? Listen closely for all of the details and ask yourself each of those questions. Compare your favorites to each other and to the standards (remember that it is perfectly fine if one of the standards is your favorite). Ask a friend or someone in the store for their thoughts on the sound. Choose the one that sounds best. If you can’t decide which one sounds best, go with the one that sounds the most similar to one of the industry standards.
Once you make your choice, bring it home and try it out in your own studio. Be sure that it still sounds as good to you at home as it did in the store. Remember that your microphone captures the sound of your environment as well as your voice and it may become evident that some changes to your room are necessary… but that is for another article.
Whether you are just starting out or are a seasoned voice over professional this process should be fun as well as informative. Best of all, after you’ve gone through the process and made your decision you will have confidence knowing that you made the best choice for you, your voice and your budget.
 From the creators of FaffCon… coming this May to the Omni Hotel in Charlotte. An event like no other in the voiceover industry… FAFFCAMP! Three days of what will prove to be the most educational experience available to both new and experienced voice actors and industry professionals.
 On Saturday night while most Faffers were out to dinner, Amy Snively, Pam Tierney and I sat in the mezzanine of the


