Dan Friedman
Voice Over Coach & Demo Producer
828.551.0891
[email protected]
  • Home
  • About
  • Demos
  • Coaching4VO
  • Books
  • Services
  • Testimonials
  • Sound4VO Blog
  • Merch
  • Contact

home studio

The Best Voice Over Coach is… Your Ears!

June 13, 2011 by Dan Friedman

home studioRecently there was a post on the Voice Artists United Facebook page that discussed coaches. The talent (who I do not know) wrote that he was discouraged by some comments that his most recent coach had made. At the time I write this, the post has 48 comments with some very popular names in the industry weighing in.

Don’t let the title of this article fool you. Getting some VO coaching is critical to your career. At a minimum, good coaches teach breathing, script construction, industry terminology, how to take direction and the mechanics of different styles and deliveries. They should also be teaching microphone technique, basic equipment needs and (hopefully) studio etiquette. Many coaches offer additional instruction on other topics related to voice over such as marketing, basic audio recording and audio editing. Coaches provide encouragement, direction and might even be able to get you a gig or two.

Voice coaches can be many things and their role and importance in your career can change as your career grows and progresses. The most important job of the coach is to be completely honest when evaluating your abilities and offering feedback. This feedback is important. But, at some point, you have to learn to hear “it” for yourself. The truth of the matter is, you have the best coach with you at all times… your ears.

Voice over coaches are indirectly trying to get every student to open their ears and truly listen. Learning to hear the differences and nuances in attitude, style, pacing, inflection, emphasis, amount of smile, etc. is, in my opinion, the real secret to doing voice over well. Almost anyone can learn to do these things with their voice if they are aware of what to do and practice doing it. However, being able to hear the subtle nuances of your delivery is what enables you to stop simply playing with words and allows you to become the communicator that every serious voice talent should work toward becoming.

Coaching deliberately teaches the techniques that get the brain, mouth and voice working together to physically do what needs to be done. But many voice talent fall short by failing to truly engage their ears. This is one reason why so many voiceovers are pieced together line by line by the engineers, whose job it is to use their ears everyday. While this is common in today’s world of fast digital editing and even clients have gotten comfortable working this way, this is not exactly how it is meant to be.

You have two ears and one mouth to remind you to use your ears twice as much. Record, read, playback, listen, adjust accordingly and do it over and over again. Learn to use your ears, use them purposefully and over time you will learn to trust them. You will know immediately what is working and what isn’t. You will learn to fine tune and self-correct. While you may still want to get professional voiceover coaching from time to time, for the most part, you will be your own coach. You will no longer need to feel discouraged by harsh critiques, or pay someone to give them to you. Instead you will get paid to take direction and be proud of the great work you’ve done for your clients.

Filed Under: Voiceover Tips & Advice Tagged With: 4VO, Dan Friedman, home studio, microphone, Recording, sound4vo, VO, VO coaching, voiceover

Allergy Season for a Voiceover Talent

May 16, 2011 by Dan Friedman

allergy seasonI live in what I think (and many will agree) is one of the most beautiful parts of the USA. However, all that lush forest and beautiful foliage brings with it pollen, allergens, and air so thick you can watch it as it blows by. For most people, allergy season is merely a nuisance. For voiceover talent, it can be frustrating, frightening and costly.

Learning to deal with allergies was never a concern for me until a few years ago. I never suffered from allergies until moving to the mountains and even then it took a few years before they took hold of me. Spring of 2010 was by far the most difficult season I’d ever had. I was unable to hear well and I definitely did not sound like myself. As someone who earns a living from having sharp hearing and a consistent vocal sound, this was definitely a problem. While I was able to work, I did not feel confident in what I was hearing and I did not like how I was sounding.

I used the neti pot three times a day. I ate locally produced honey. Before and during sessions, I ate spicy food, brought jalapeño peppers into the booth with me and put mentholatum ointment under my nose. I took anti inflammatory medication, OTC Phenq allergy and cold medicines and finally, after six weeks of suffering, got a nasal spray prescription from my doctor. Thankfully that prescription cleared things up for me. Other than a few weeks during mid summer and mid winter, I’ve taken it ever since. While I still felt the effects of allergy season this year, overall it has been much better.

I was lucky. To my knowledge, I didn’t lose any voice work and my production work was solid. The sinus pain and pressure was bad, but the most difficult part was the fear that I would lose work and the lack of confidence I had in my abilities during this time. I know there are many voiceover talent who suffer from allergies and all of the symptoms that come with them. I tried everything before turning to a prescription for relief, but in the end it was the only thing that worked for me.

If you are an allergy sufferer and a voice talent…what works for you?

Filed Under: Sound4VO News, Voiceover Tips & Advice Tagged With: 4VO, Dan Friedman, home studio, Sound Advice Voiceover From an Audio Engineer's Perspective, VO, voiceover talent

Your Room and You

May 9, 2011 by Dan Friedman

studio, home studioWhile there are many elements to producing great voiceovers, few are as important as the room you produce them in. While it is important to carefully evaluate the sound of your room when it is completed, there are some basic things to consider in the beginning that will help ensure your space will sound great in the end. Here are some quick tips on choosing and creating your VO space.

Location
The space you choose should be a quiet place. Basements can be a good choice because they are often underground. Upper levels can also be a good choice because they are free from noise overhead. Spaces in your home farthest away from roads or other sources of outside noise are ideal. Begin by picking the right location based on what is available to you, and you will be off to a good start.

Size

You need a space that is comfortable and capable of containing you and your equipment. At a minimum you need room for yourself, a microphone, microphone stand and a copy stand and/or computer monitor. You may also wish to have a chair and some of your equipment in the space with you (the quiet pieces only please).

Dimensions

It is important to consider the dimensions of your room. Because of the way sound travels, square rooms are bad. Ideally the dimensions will be different or not evenly divisible by one another.

Sound Proofing

In a home studio setup, it can be difficult to completely keep outside sounds from entering your recording space. This is why choosing the best location is critical. If you are building your space, you’ll want to isolate it as much as possible by separating it from the rest of your structure. Using double thick walls, creating air-gaps between walls and floating the floor are commonly used methods. Think of it as building a room within a room.  If you are simply creating a space or using a prefabricated “voice booth”, keep it away from noisy household equipment and keep all of your noisy studio gear (anything with a running fan) outside of the room and away from the voicing area.

Acoustic Treatment

Treating the acoustics within your space is the final step. There are many products on the market that can help you with this or you can create your own. Acoustic foam panels of various sizes, thicknesses and shapes are just one of several options (panels made from mineral wool fiber covered in burlap are my personal choice.) Whether you are using pre-cut foam, buying other acoustic control materials or creating your own acoustic panels, the thickness of the panels determines what frequencies they work best to control. To tame bass or low frequencies you need thick panels, usually no less than 6 inches thick. For mid range and higher frequencies 2 and 3 inch thick panels will usually do the job. Absorbent materials and varied surfaces (such as pyramid or triangle shapes on foam) help to reduce reflections that cause a room to sound reverberant.

Location, size, dimensions, soundproofing and acoustic treatment are the fundamental considerations. This article is meant to get you thinking about these elements as you work on your voiceover recording space. For more in-depth information about room acoustics and sound treatment I recommend the following links:
Acoustics101.com
GIKAcoustics.com
RealTraps.com

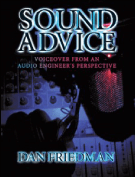
For more information about sound and how it relates to your voiceover career check out: Sound Advice – Voiceover From An Audio Engineer’s Perspective.

It is important to understand that effective sound control requires that you utilize space and use materials that have mass. While there are several products available that wrap around your microphone or even you and your microphone, none of these are as effective as treating the room you are in properly. If you are serious about your career in voiceover you will get serious about your room. Other than your voice, nothing is more important to your sound than your recording environment.

Filed Under: Studio & Gear Tagged With: 4VO, acoustics, Dan Friedman, home studio, Recording, sound4vo, VO, voiceover, voiceover book

Audio Terms and Definitions

May 3, 2011 by Dan Friedman

Dan Friedman, microphoneGood communication is a key to success in all relationships. Often miscommunication and misunderstandings between people occur because they simply don’t know how to “speak the same language”. I’m not talking about the difference between English and Chinese. I’m talking about technical audio terms. In the business world, nearly every type of business, has a name for everything they do. The recording and voiceover world is no different.

In an effort to overcome the “language barrier” that often exists among engineers, directors, clients and talent, my friends and I have put together a glossary of voice over studio terms that everyone in this business should know.

While individual studios and production companies may also have unique terminology that is used internally, this list will provide you with key terms that are fairly universal throughout the industry.

Enjoy!

AUDIO TERMS and DEFINITIONS

ADR – (Automated Dialog Replacement) Also referred to as ʻloopingʼ. The process of replacing a voice over for an on-camera talent.

Compression – The use of an audio processor to control audio dynamics (loudness and softness) on a piece of audio. It can be arcoxia 90 applied to individual parts as well as to an overall production.

Data compression – Process designed to reduce the transmission bandwidth requirement of digital audio streams and the storage size of audio files.

De-breathing – The process of removing all breaths from a vocal performance.

Editing – The process of removing unwanted portions of audio, leaving only the portion that will be used in the final production. May or may not include de-breathing.

Equalization (EQ) – The use of an audio processor to manipulate the frequencies that exist within all sounds heard by the human ear.

Audio File Formats – Common uncompressed audio file types used in audio production are: AIFF & WAV. Compressed audio files are typically MP3.

ISDN – Integrated Services Digital Network – A communication standard allowing the transmission of voice (as well as video and data) from one studio to another over telephone lines in high speed, digital quality and with great fidelity.

Limiting – The use of an audio processor to keep audio from exceeding a certain level or threshold as determined by the engineer.

Maximization or Maximize – A mastering process that includes the use of an audio processor to bring audio up to a maximum level as determined by the engineer.

Mix – A fully produced, finished or broadcast ready audio presentation that may include voice, music, sound effects, all necessary processing and maximization. Usually provided in stereo unless the final format is mono only (such as a phone system)

Mixing – The process of manipulating and combining multiple audio signals or elements to create a final audio production or mix.

Noise – Any sound that is undesirable or unwanted.

Normalize – To increase or decrease audio levels to a fixed point based on the peak point or RMS equation.

Processing – Any alteration of raw audio through the use of audio tools such as compression, equalization (EQ), maximization, or time- based/space-based effects (i.e. – delay or reverb).

Raw Audio – Any recorded audio that is unedited and unprocessed. Delivery of “raw audio” means to provide clients with audio exactly as it was recorded.

Reverb – A space/time based effect that simulates an environment. All environments have an effect on a sound within that environment.
Example: A voice heard in a stadium sounds different than a voice heard in a closet. Reverb can be used to simulate the sound of both environments. Some people refer to this as “echo” (IMPORTANT NOTE: the use of reverb is very dependent on an overall production and therefore is rarely added unless a full mix is being produced).

Sample Rate/Bit Rate – Essentially the amount of digital information used by the computer in the creation of an audio file. The higher the rate, the higher the supposed quality of the file. However, beyond a certain point (for most people above 44.1kHz/16 bit) the difference in sound quality is undetectable. Therefore, the need to obtain/verify this information becomes necessary primarily for compatibility among files or systems.

44.1kHz/16bit = CD quality audio

48kHz/16bit = Video standard for audio

Slate – A recorded audio cue that identifies the audio that follows. Generally stated as, “take one (followed by the recorded VO), take two (followed by the recorded VO) take three…” etc.

Stems – Individual elements of a mix provided separately. Voice, music, and sound effects provided as separate files instead of combined in a full mix.

Takes – A separate file of recorded audio. Each take is identified by a separate file name and a slate.

Time Compression/Expansion – An electronic process using an algorithm which leaves the pitch of the signal intact while changing its speed (tempo)

Filed Under: Audio Production, Voiceover Tips & Advice Tagged With: 4VO, home studio, Recording, Sound Advice Voiceover From an Audio Engineer's Perspective, sound4vo, VO, voiceover, voiceover book, voiceover recording

  • « Go to Previous Page
  • Page 1
  • Page 2

Primary Sidebar

Search Blog

Categories

Want to see how well we work together first? LET’S DO IT!!

Book a Single Session
Book a FREE Meet & Greet

Follow Sound4VO

Dan Friedman Voice Over Coach & Demo Producer Tiktok

Tip Jar

Have questions on anything related to voiceover? Dan is available for email consultations at no charge. Ask away! If he's able to help you with your problem, tips are greatly appreciated... Use the "tip jar" below to show Dan the love!

Dan Friedman Voice Over Coach & Demo Producer Tiktok

[email protected]

828.551.0891

Dan Friedman Voice Over Coach & Demo Producer Zen and the art of Voiceover Audiobook Cover Img
Buy Now
Dan Friedman Voice Over Coach & Demo Producer Sound Advice Cover Img
Buy Now

RLM CERTIFIED MASTER COACH Since 2021

Dan Friedman Voice Over Coach & Demo Producer RLMC Logo

©2025 Dan Friedman Sound4VO // Voice Over Site by Voice Actor Websites

MENU
  • Home
  • About
  • Demos
  • Coaching4VO
  • Books
  • Services
  • Testimonials
  • Sound4VO Blog
  • Merch
  • Contact