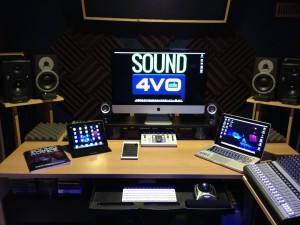
 It is as simple as this… if you want to work in voiceover, you need a home studio. I know it seems hard to believe, but it is true; the days of being chauffeured around from studio to studio where you talk for a few minutes and line your pockets with cash are long gone… and have been for years. More recently, the need for racks filled with expensive magic audio boxes has also become unnecessary. Today, with nothing more than a USB microphone and an iPad, you can be recording high quality audio in no time.
Well… sort of.
In this installment, of what will be a three part series, I’ll discuss the second of three types of voiceover recording setups. Each setup will cover reasonable price ranges that will, at a minimum, be capable of providing an acceptable level of quality as well as varying degrees of flexibility. A professional working voice talent could easily own all three of these setups at different points in their career, or even use any one of the three interchangeably with the other two. With proper planning, the smallest, most portable and least expensive setup can easily grow with and become an integral part of the most comprehensive and expensive setup.
While these setups are different, there are at least two common denominators that will remain constant. They are, and always will be, the two most important factors in your sound and your success… you and the space in which you record. The cheapest setup can sound great (or at the very least… useable) with an amazing talent, performing in a great sounding space. A great performance on expensive equipment can be useless in a noisy or terrible sounding space. Keep that in mind as we explore the following VO setup.
Voiceover Recording Setup 2
For recording setup two, rather than going with a tablet (which was discussed in The Anatomy of Three Voiceover Home Studios Part 1), choose a high quality laptop computer.
Personally, I believe that this setup is the one everyone needs at a minimum. The tablet based recording studio is very limited when it comes to choices and flexibility. Going with a laptop, rather than a tablet, opens up a world of possibilities. With a laptop computer you’ll get far better: storage capacity, ease of use, compatibility with hardware interfaces, including both USB and firewire, and access to most all of the DAW options (depending on which OS you choose). The flexibility alone is well worth the additional cost. The computer is the foundation of your studio. So, no matter what level you are at, spending the most money here is always well worth the added investment.
When using a full featured computer, the world of available interfaces increases dramatically. You can use USB interfaces or upgrade to the faster firewire or thunderbolt options. Most interfaces in this category offer preamps and phantom power, and many have multiple preamps. For this studio setup, I’ll assume that you’ll still want to keep it portable. Therefore most of your options will fall between $150 and $750.
Having at least two inputs on your preamp/interface allows you to add another key component to your studio… the phone patch. The phone patch allows you to pipe in a client/director to your headphones and receive direction live during a session. Most phone patch devices are designed to work with land lines but the JK Audio Daptor 2 works with cell phones. This is a bit more practical since many people are abandoning their land lines.
While recording, even on a powerful laptop, it is good practice to close other applications on your computer and use only those that are most critical to getting the job done such as your DAW, interface control panel, etc. Its not recommended that you surf the internet, talk on Skype and manipulate Excel spreadsheets while simultaneously recording audio (like you would want to work on a spreadsheet… HA!). Attempting to multitask in this way is not only difficult for you, but can make it possible for erroneous sounds, possible anomalies and errors to sneak into your recordings. For this reason, it is still very useful to add a tablet into your studio setup.
With a tablet, there are many useful apps that you can easily incorporate into your workflow including apps for reading and editing scripts (no more paper), timers/stopwatches and communications apps such as Skype. Perform these peripheral tasks on your tablet while recording and editing on your laptop.
Besides being far more flexible and overall easier to use, there is also at least one area for cost saving that is available by choosing a laptop. While a comprehensive and full featured DAW is recommended, Audacity software is FREE and available for both Mac and PC. Compared to most DAW’s, Audacity is a bit “clunky” in its operation. But, it is capable of doing most recording, editing and even processing tasks that are important to a voice talent. Another consideration is that many hardware interfaces come packaged with DAW “lite” versions. Not only are they capable of performing critical recording and editing tasks, they are also a great introduction to the full versions of the software.
Itemized estimated costs:
High quality laptop w/OS and basic software – $1200
DAW – $0 – $500 (Audacity and “lite” DAW software = $0, full versions = $500)
USB/Firewire PreAmp-AD/DA Converter – $150 – $750
Standard LDC microphone – $300
Phone patch – $175
Headphones – $100
Cables/adaptors – $50
Heavy duty microphone stand w/boom – $150
Setup 2 cost = aprox. $2125 – $3225
Add a tablet for an additional $550 (If you started with setup one and are adding components… you’ll already have a tablet).
In the final installment of this three part series, the sky is the limit! I hope you’ll check it out.


