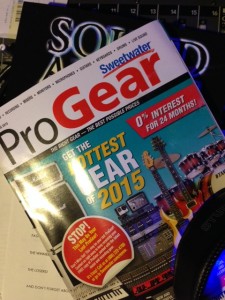
 Other than checks and gifts there are few things that we in the voiceover industry receive in the mail that are quite as exciting as the ProGear catalog from Sweetwater. While I have made purchases with many retailers over the years, none of them offers a catalog quite as alluring as Sweetwater. The ProGear catalog is filled with plenty of photos and some really helpful tips on how to get the most out of the gear in your studio. The tech tips and Q&A interviews scattered throughout are worth much more than the weight they add to the catalog … and allow me to say that I don’t just get it for the pictures. 😉
(This year the Victoria’s Secret catalog arrived in my mail on the same day as the Sweetwater catalog. I scanned it thoroughly … twice … and found no helpful articles.)
If you are buying studio gear for the first time, want to upgrade and get the most bang for your buck, or simply have no interest in becoming a “techy,” then even the Sweetwater catalog (as sexy as it is … ahem, I mean informative) can be somewhat overwhelming. You just can’t try everything before you buy. So, how do you choose?
Just as we interpret scripts for meaning and subtext, we also have to interpret descriptions of the gear. For instance, if a microphone has a description that includes “vintage sound” that microphone probably has some characteristics that are noticeable or recognizable. This should probably be interpreted to mean that the microphone, although it may sound spectacular on many sources, may not capture our voice as purely as we would prefer. The microphone will have its own sonic character. A description that includes “accuracy” or “clean and clear” may be the better choice.
A microphone’s description may include the acronym “SPL” (Sound Pressure Level). This means the loudness level (or volume) of the source sound (e.g. – your voice). While we are not necessarily shouting, we may be close to the microphone for intimate reads. As such, the microphone may still be receiving a fairly significant amount of sound pressure level at close proximity. A microphone’s ability to handle high SPLs without distortion is important to us as voiceover artists.
The descriptions included with interfaces and preamps are filled with hyperbole. Once again, terms such as “accurate” and “clean” will be words to look for. Many of us work with multiple DAWs (Digital Audio Workstations) and travel with our gear, therefore “flexibility” and “portability” are terms to watch for as well. Preamps/Interfaces are easy to return or exchange if they don’t offer the level of quality you are hoping for. (Due to health concerns, exchanging microphones can be a bit more complicated. Be sure to check with your retailer regarding their return policies). Furthermore, you will often find another similarly priced preamp/interface from another manufacturer that will.
Truth be told, if you were recording an instrument with a broad range of frequencies such as a piano or recording an entire orchestra, the overall ability of your interface to capture those sounds would be critical. Your voice takes up much less sonic space. At the low end of the price spectrum you will not notice too many differences in an interface’s ability to capture sound (or differences listed in the catalog). However, there are a few areas where you will notice significant differences. One of the things that separates good quality gear from gear that is barely acceptable (or not at all acceptable in my opinion) is the sensitivity of the knobs. Small changes to the preamp on a physical knob should not cause dramatic jumps in signal level (up or down). Level changes should be as smooth as the knob you are turning essenceapotek. Another difference is headroom, or the ability of the preamp to produce an adequate signal level while still allowing you to increase the gain should you need it. Other critical differences are self-noise and the software and interface options they may or may not offer.
For studio monitors it is important to remember that you are working primarily with your voice. Therefore it isn’t necessary to have features such as “extended bass response.” Be sure to pay attention to whether the studio monitors are “powered” or “active.” This means they have their own amplifiers built into the speaker enclosure. Remember, the size of your listening environment will help determine what size studio monitors will best meet your needs. If you are going to be using your speakers in a small space, then “nearfield” monitors are the way to go.
Just like with studio monitors, headphones may offer a number of features you simply do not need when working with voice alone. However, there are some features you will definitely want to consider. A closed back design is one of those must-have features. This design helps reduce the possibility of sound being emitted by your headphones from leaking into your microphone. Headphone bleed is a sound you do not want to have to try to edit out of your recordings later. You’ll also want to be certain that the headphones you choose are comfortable as you may be wearing them for an extended period of time.
Hopefully, some of what I’ve shared here will start you on the right path. Clearly, every description is intended to influence you to buy. We can do our best to interpret greater meaning within these descriptions, but in the end, it will always come back to listening for yourself. Above all else, no matter what piece of gear you choose or which retailer you choose to purchase from, there is no substitute for a stellar performance and a great sounding recording environment.
Thank you Sweetwater for producing a catalog that is loved by everyone in our industry!


