Dan Friedman
Voice Over Coach & Demo Producer
828.551.0891
[email protected]
  • Home
  • About
  • Demos
  • Coaching4VO
  • Books
  • Services
  • Testimonials
  • Sound4VO Blog
  • Merch
  • Contact

home studio

Voiceover – The New Catalog is Here!

February 24, 2015 by Dan Friedman

IMG_1791
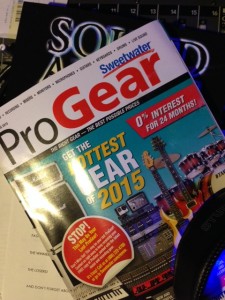
Other than checks and gifts there are few things that we in the voiceover industry receive in the mail that are quite as exciting as the ProGear catalog from Sweetwater. While I have made purchases with many retailers over the years, none of them offers a catalog quite as alluring as Sweetwater. The ProGear catalog is filled with plenty of photos and some really helpful tips on how to get the most out of the gear in your studio. The tech tips and Q&A interviews scattered throughout are worth much more than the weight they add to the catalog … and allow me to say that I don’t just get it for the pictures. 😉

(This year the Victoria’s Secret catalog arrived in my mail on the same day as the Sweetwater catalog. I scanned it thoroughly … twice … and found no helpful articles.)

If you are buying studio gear for the first time, want to upgrade and get the most bang for your buck, or simply have no interest in becoming a “techy,” then even the Sweetwater catalog (as sexy as it is … ahem, I mean informative) can be somewhat overwhelming. You just can’t try everything before you buy. So, how do you choose?

Just as we interpret scripts for meaning and subtext, we also have to interpret descriptions of the gear. For instance, if a microphone has a description that includes “vintage sound” that microphone probably has some characteristics that are noticeable or recognizable. This should probably be interpreted to mean that the microphone, although it may sound spectacular on many sources, may not capture our voice as purely as we would prefer. The microphone will have its own sonic character. A description that includes “accuracy” or “clean and clear” may be the better choice.

A microphone’s description may include the acronym “SPL” (Sound Pressure Level). This means the loudness level (or volume) of the source sound (e.g. – your voice). While we are not necessarily shouting, we may be close to the microphone for intimate reads. As such, the microphone may still be receiving a fairly significant amount of sound pressure level at close proximity. A microphone’s ability to handle high SPLs without distortion is important to us as voiceover artists.

The descriptions included with interfaces and preamps are filled with hyperbole. Once again, terms such as “accurate” and “clean” will be words to look for. Many of us work with multiple DAWs (Digital Audio Workstations) and travel with our gear, therefore “flexibility” and “portability” are terms to watch for as well. Preamps/Interfaces are easy to return or exchange if they don’t offer the level of quality you are hoping for. (Due to health concerns, exchanging microphones can be a bit more complicated. Be sure to check with your retailer regarding their return policies). Furthermore, you will often find another similarly priced preamp/interface from another manufacturer that will.

Truth be told, if you were recording an instrument with a broad range of frequencies such as a piano or recording an entire orchestra, the overall ability of your interface to capture those sounds would be critical. Your voice takes up much less sonic space. At the low end of the price spectrum you will not notice too many differences in an interface’s ability to capture sound (or differences listed in the catalog). However, there are a few areas where you will notice significant differences. One of the things that separates good quality gear from gear that is barely acceptable (or not at all acceptable in my opinion) is the sensitivity of the knobs. Small changes to the preamp on a physical knob should not cause dramatic jumps in signal level (up or down). Level changes should be as smooth as the knob you are turning essenceapotek. Another difference is headroom, or the ability of the preamp to produce an adequate signal level while still allowing you to increase the gain should you need it. Other critical differences are self-noise and the software and interface options they may or may not offer.

For studio monitors it is important to remember that you are working primarily with your voice. Therefore it isn’t necessary to have features such as “extended bass response.” Be sure to pay attention to whether the studio monitors are “powered” or “active.” This means they have their own amplifiers built into the speaker enclosure. Remember, the size of your listening environment will help determine what size studio monitors will best meet your needs. If you are going to be using your speakers in a small space, then “nearfield” monitors are the way to go.

Just like with studio monitors, headphones may offer a number of features you simply do not need when working with voice alone. However, there are some features you will definitely want to consider. A closed back design is one of those must-have features. This design helps reduce the possibility of sound being emitted by your headphones from leaking into your microphone. Headphone bleed is a sound you do not want to have to try to edit out of your recordings later. You’ll also want to be certain that the headphones you choose are comfortable as you may be wearing them for an extended period of time.

Hopefully, some of what I’ve shared here will start you on the right path. Clearly, every description is intended to influence you to buy. We can do our best to interpret greater meaning within these descriptions, but in the end, it will always come back to listening for yourself. Above all else, no matter what piece of gear you choose or which retailer you choose to purchase from, there is no substitute for a stellar performance and a great sounding recording environment.

Thank you Sweetwater for producing a catalog that is loved by everyone in our industry!

Filed Under: Studio & Gear Tagged With: 4VO, Dan Friedman, home studio, ProGear, Recording, Room acoustics, Sound Advice Voiceover From an Audio Engineer's Perspective, sound4vo, Sweetwater, VO, voiceover, voiceover book, voiceover recording, voiceover talent

The Anatomy of Three Voiceover Home Studios Part 3

April 4, 2013 by Dan Friedman

SOUND4VOStudio It is as simple as this… if you want to work in voiceover, you need a home studio. I know it seems hard to believe, but it is true; the days of being chauffeured around from studio to studio where you talk for a few minutes and line your pockets with cash are long gone… and have been for years. More recently, the need for racks filled with expensive magic audio boxes has also become unnecessary. Today, with nothing more than a USB microphone and an iPad, you can be recording high quality audio in no time. Well… sort of.

In this final installment, of the three part series(part 1) (part 2), I’ll discuss a third type of voiceover recording setup. In this setup… the sky is the limit! Keep in mind, that in any recording setup, there are at least two common denominators that will remain constant. They are, and always will be, the two most important factors in your sound and your success… you and the space in which you record. The cheapest setup can sound great (or at the very least… useable) with an amazing talent, performing in a great sounding space. A great performance on expensive equipment can be useless in a noisy or terrible sounding space.

With that in mind, let’s checkout setup number three.

Voiceover Recording Setup 3

While setup 1 and setup 2 are portable, portability was never the goal. Consistency from one session to the next is a critical element to success in voiceover. Therefore, remaining in one space is preferred. Recording setup 3 is stationary, and there are other big changes that will have you prepared for anything. One of the biggest changes is incorporating a mixer into the setup, which will allow you to include phone patch and (when you are ready and if the technology is available where you are geographically) an ISDN codec.

I could very easily have added them to the other two setups but with setup 3, the other big change is the necessity for studio monitors (speakers). Nobody should be listening critically to audio on headphones alone. Headphones, by design, do not give you a true picture of how we hear sound in the real world. We hear with both of our ears in combination, not with the left and right sides in isolation. Studio monitors are a personal preference. Whichever monitors you choose, you should give yourself some time to get familiar with their characteristics. More importantly, they should be comfortable for you to listen on over long periods of time.

Most components listed in setup 2 will remain the same for this setup. Instead of a laptop, a desktop computer will serve as the focal point for this studio. This will likely increase your storage capacity and speed. It will also give you more visual real estate due to a bigger computer monitor (the screen) and you can get even more real estate by adding an additional monitor.

With this setup, the sky is the limit when it comes to options, components and prices. Upgrades are possible in all areas of your audio chain. While the $300 microphone may still be perfect for you, it may be worthwhile to explore more expensive options. The same is true for your preamp, interface, cables and… well… everything. The price ranges I’ve listed below, now reflect the cost of higher priced equipment that can be found in many home voiceover studios.

Overall estimated cost:

High quality desktop computer w/OS and basic software – $1500 – $3000
DAW – $0 – $1800 (Audacity and “lite” DAW software = $0, full versions = $1800)
Separate Preamp – $500 – $2500
USB/Firewire Preamp or standalone AD/DA Converter – $150 – $2500
Mixer – $100 – $1000
Standard (XLR) LDC microphone – $300 – $1200
ISDN Codec or Source Connect Pro Software – $1000 – $3000
Phone patch – $175 – $500
Headphones – $100
Studio Monitors – $300 – $1600
Cables/adaptors – $50 – $200
Heavy duty microphone stand w/boom – $150

Setup 3 cost = aprox. $4325 – $17,550

Your home studio. For just over $1000, which was discussed in part one of this series, all the way up to over $17,000 (and beyond) you can be recording, editing and producing voiceovers. Note that these costs don’t take into consideration acoustic treatment or sound proofing (the prices for Whisper Rooms, for example, begin at just over $3000). Furthermore, if you’re interested in doing full production and mixing, you’ll need music, sound effects and audio processing plugins to go along with your DAW software.

Some of the items listed can be combined and many of the items are transferable from setup to setup, allowing your studio to build upon itself and grow with your career. Also, it is more likely that setup 1 could be the last setup you buy rather than your first. The portable studio is far more useful to voice talent who’ve been working at this awhile and are in higher demand.

So, now that you’ve gotten your studio budget figured out… start working on your budget for coaching, marketing materials, website, travel to industry events and your very own… chauffeured limousine. 😉

Filed Under: Studio & Gear Tagged With: Dan Friedman, home studio, sound4vo, voiceover, voiceover book, voiceover recording

The Anatomy of Three Voiceover Home Studios – Part 2

March 8, 2013 by Dan Friedman

It is as simple as this… if you want to work in voiceover, you need a home studio. I know it seems hard to believe, but it is true; the days of being chauffeured around from studio to studio where you talk for a few minutes and line your pockets with cash are long gone… and have been for years. More recently, the need for racks filled with expensive magic audio boxes has also become unnecessary. Today, with nothing more than a USB microphone and an iPad, you can be recording high quality audio in no time.

Well… sort of.

In this installment, of what will be a three part series, I’ll discuss the second of three types of voiceover recording setups. Each setup will cover reasonable price ranges that will, at a minimum, be capable of providing an acceptable level of quality as well as varying degrees of flexibility. A professional working voice talent could easily own all three of these setups at different points in their career, or even use any one of the three interchangeably with the other two. With proper planning, the smallest, most portable and least expensive setup can easily grow with and become an integral part of the most comprehensive and expensive setup.

While these setups are different, there are at least two common denominators that will remain constant. They are, and always will be, the two most important factors in your sound and your success… you and the space in which you record. The cheapest setup can sound great (or at the very least… useable) with an amazing talent, performing in a great sounding space. A great performance on expensive equipment can be useless in a noisy or terrible sounding space. Keep that in mind as we explore the following VO setup.

Voiceover Recording Setup 2

For recording setup two, rather than going with a tablet (which was discussed in The Anatomy of Three Voiceover Home Studios Part 1), choose a high quality laptop computer.

Personally, I believe that this setup is the one everyone needs at a minimum. The tablet based recording studio is very limited when it comes to choices and flexibility. Going with a laptop, rather than a tablet, opens up a world of possibilities. With a laptop computer you’ll get far better: storage capacity, ease of use, compatibility with hardware interfaces, including both USB and firewire, and access to most all of the DAW options (depending on which OS you choose). The flexibility alone is well worth the additional cost. The computer is the foundation of your studio. So, no matter what level you are at, spending the most money here is always well worth the added investment.

When using a full featured computer, the world of available interfaces increases dramatically. You can use USB interfaces or upgrade to the faster firewire or thunderbolt options. Most interfaces in this category offer preamps and phantom power, and many have multiple preamps. For this studio setup, I’ll assume that you’ll still want to keep it portable. Therefore most of your options will fall between $150 and $750.

Having at least two inputs on your preamp/interface allows you to add another key component to your studio… the phone patch. The phone patch allows you to pipe in a client/director to your headphones and receive direction live during a session. Most phone patch devices are designed to work with land lines but the JK Audio Daptor 2 works with cell phones. This is a bit more practical since many people are abandoning their land lines.

While recording, even on a powerful laptop, it is good practice to close other applications on your computer and use only those that are most critical to getting the job done such as your DAW, interface control panel, etc. Its not recommended that you surf the internet, talk on Skype and manipulate Excel spreadsheets while simultaneously recording audio (like you would want to work on a spreadsheet… HA!). Attempting to multitask in this way is not only difficult for you, but can make it possible for erroneous sounds, possible anomalies and errors to sneak into your recordings. For this reason, it is still very useful to add a tablet into your studio setup.

With a tablet, there are many useful apps that you can easily incorporate into your workflow including apps for reading and editing scripts (no more paper), timers/stopwatches and communications apps such as Skype. Perform these peripheral tasks on your tablet while recording and editing on your laptop.

Besides being far more flexible and overall easier to use, there is also at least one area for cost saving that is available by choosing a laptop. While a comprehensive and full featured DAW is recommended, Audacity software is FREE and available for both Mac and PC. Compared to most DAW’s, Audacity is a bit “clunky” in its operation. But, it is capable of doing most recording, editing and even processing tasks that are important to a voice talent. Another consideration is that many hardware interfaces come packaged with DAW “lite” versions. Not only are they capable of performing critical recording and editing tasks, they are also a great introduction to the full versions of the software.

Itemized estimated costs:

High quality laptop w/OS and basic software – $1200
DAW – $0 – $500 (Audacity and “lite” DAW software = $0, full versions = $500)
USB/Firewire PreAmp-AD/DA Converter – $150 – $750
Standard LDC microphone – $300
Phone patch – $175
Headphones – $100
Cables/adaptors – $50
Heavy duty microphone stand w/boom – $150

Setup 2 cost = aprox. $2125 – $3225

Add a tablet for an additional $550 (If you started with setup one and are adding components… you’ll already have a tablet).

In the final installment of this three part series, the sky is the limit! I hope you’ll check it out.

Filed Under: Studio & Gear Tagged With: Dan Friedman, home studio, sound4vo, voiceover, voiceover book, voiceover recording

Recording Magazine’s Room Acoustics Series Part 5

September 28, 2011 by Dan Friedman

Recording Magazine sends out a newsletter to its subscribers every few weeks. The newsletter is (coincidentally) titled “Sound Advice” and this month it features the fifth in a series about room acoustics. Room acoustics is one of the biggest concerns for Recording Magazine readers. I know that this is also a big issue for those of you in the voiceover world. I asked permission to reprint this newsletter (and will ask to reprint the others in the series as well) so that those of you with home studios can also benefit from the information. I want to personally thank Brent Heintz, VP/Associate Publisher for granting permission, allowing me to share this great information with you.

Please visit Recording Magazine‘s website and Facebook Page.

Catch up or skip ahead: Part 1, Part 2, Part 3, Part 4, Part 6, Part 7, Part 8.

Here is the fifth newsletter in the series on Room Acoustics:

Welcome to Sound Advice on Acoustics! For the past several months we’ve been dealing with the basics of controlling bass buildup in rooms, using ratios of room dimensions and active bass trapping and other room treatments. Bass is by far the hardest problem to deal with in tuning a room, and with it under control, we can now turn our attention to the mids and highs. Read on…!So far we’ve considered the effects of low-frequency waves in the room. There are other issues, related to the propagation of mid and high frequencies. When a mid- or high-frequency sound wave moves through a room, it eventually hits one of the various boundary surfaces (walls, ceiling, floor). When this occurs, the sound wave is either absorbed, transmitted, or reflected.

Absorption means that some or most of the wave’s energy is converted into heat. Transmission means that the wave has some of its energy passed—through the wall, for example. Reflection means that most of the wave’s energy is directed back into the room.

This will happen repeatedly as the sound wave hits various surfaces until all its energy is eventually dissipated.

A room where all the surfaces are completely absorptive sounds dead and unnatural, and is unsuitable for music-making or listening. Such a room, called an anechoic chamber, would be used for testing purposes, as in the manufacture of loudspeakers for example, to isolate the sound quality of the speaker under test from the room effects. An overly reflective room is also not ideal—too many reflections tumbling around the room obscure the clarity of music or speech (see below).

An ideal room strikes the right balance between the original sound from the source (i.e. instrument or loudspeaker) and the amount of reflected sound present. Furthermore, it is desirable for the reflected sound to be distributed as evenly as possible throughout the room, providing a comfortable and pleasant sense of ambience (liveness). This even distribution of reflected sound energy is called , and is generally desirable, as we’ll see. But along the road to this ideal room, there are many pitfalls that we’ll now examine.

Reflection of sound waves is the behavior we’ll be most concerned with in the next few paragraphs. Just as happens with lower frequencies, when mid- and high-frequency waves reflect back into a room, the positive and negative peaks of the direct (original) sound waves and those of the reflections will cancel and reinforce. This happens because the reflections are delayed in time relative to the direct sound, causing their positive and negative peaks to be offset from those of the direct sound, which results in the interference (see Figure 5 for an illustration of this).

FIG:5A AND FIG:5B
In describing this, if we express the duration of a single cycle of a wave in measurements of phase, the delayed reflections as shown in Figure 5 can be said to be “out of phase” with the original sound. This phase-induced delay, or phase shift, is inevitable in any normal reflective environment.The short wavelengths of mid and high frequencies means that these cancellations and reinforcements occur more frequently all throughout the room rather than being clearly localized to specific broad areas as with standing waves. In a typical room, many complex interferences like this at higher frequencies result in changes in the frequency balance of sound in that room, as illustrated on a frequency response graph in Figure 6. This is called a comb filter response.
FIG:6

While this resulting frequency response may look very ragged, in actuality our hearing systems tend to average out and largely gloss over these subtle, myriad cancellations and reinforcements, and instead may perceive this as a not unpleasant coloration of the sound in a casual listening environment.

However, a recording studio is not a casual listening environment. For example, we depend on what we hear in the control room to make important decisions about the way the sounds in a recording blend and balance. We need to hear exactly what’s in the recording, not a “pleasantly colored” reproduction. Consequently, we need to exert some degree of control over any such effects that impact the neutrality of the monitoring environment.

With all this knowledge under our hats, it is time to look at another fundamental (excuse the pun) aspect of acoustics: how we hear. Next time: a crash course in how our ears and brains interpret sound. See you then!

Filed Under: Audio Production Tagged With: audio engineers, Dan Friedman, home studio, Recording, Room acoustics, sound advice, VO, voiceover

Voiceover Gear, Quality and Rates… a Correlation?

August 13, 2011 by Dan Friedman

home studio, Dan Friedman, correlationTwo of the biggest ongoing issues in the voiceover world are gear and rates. It seems that voice talent (or voice talent wannabes) are always looking for the latest, greatest, smallest and cheapest piece of gear that is good enough to record audio. They also seem to want the ability to do this from just about anywhere. The issue of rates is always a big concern. Job offers for payments that fall considerably short of generally accepted rates frequent the internet. These offers are often discussed as being reprehensible or even laughed at on social media. So, is there a correlation between cheap gear and low rates?

Portability and the ability to respond quickly to client requests are key factors that drive the need for much of this gear. The desire to provide for clients is essential to your VO business and let’s face it, the gear is often pretty cool and some of it sounds quite good. But the environment plays a much bigger role in your overall sound and just because you can record from your car or a hotel room, doesn’t mean you should. Other than your voice and performance, nothing has a greater effect on your sound than the environment you’re in.

Consistency and quality are critical for great sounding productions. These can only be guaranteed when the environment is a professional one, usually a professionally equipped recording studio or home studio. Consistency is especially critical when it comes to revisions. Even musicians, who are the largest consumers of recording gear, know that most of this low-end gear is for laying down ideas and for doing pre-production. When they are ready to make an album, serious musicians will usually go to a professional recording studio.

One of the biggest complaints about the voiceover industry, from those who are in it, is that so many people think that voiceover is easy and anyone can do it. Well, it should come as no surprise that when people brag about recording from their car, on their smart phones and through the multitude of cheap pieces of plastic that are now available at the megastore down the street, outsiders may believe that this is not all that difficult. Newbies don’t always understand performance or quality, but they usually understand the concept of making money from anywhere for very little investment.

On the flip-side, clients who (to their detriment) don’t always care about quality are not going to offer higher rates if they think the job can be done anywhere and/or with nothing more than a USB microphone plugged into a laptop. Clients who know better are usually willing to pay for the quality and service that come with a professional talent, who records in a professional environment, on professional gear. They understand that, just like in their own businesses, to be among the best requires an investment in time and money. Clients can justify higher talent payments more easily when they know that the audio will be professionally recorded and will be consistent from one session to the next.

Having higher-quality equipment and a proper recording space helps you to justify demanding a higher price for your work. Good clients understand the correlation between your investment in training and gear and the value that results.

If you are a voiceover talent, who loves and respects this industry, you will hopefully continue to work towards providing the highest quality audio possible and consistency from one session to the next. This doesn’t mean that you should not provide for your clients in emergency situations… you should. It also does not mean that you must have the most expensive pieces of gear. It simply means that you will continue to seek out the best equipment for you and your situation until you reach the point that any change would not provide a significant improvement. Do not stop at “good enough.”

Filed Under: Studio & Gear Tagged With: audio, Dan Friedman, home studio, microphone, Recording, USB microphone, voiceover, voiceover talent

Interview with Bill DeWees

June 19, 2011 by Dan Friedman

logo 4voI had a great time doing an Interview with Bill DeWees. Check it out and look for more from Bill on his VoiceOverExpert You Tube Channel.


Thank you, Bill!

Filed Under: Sound4VO News Tagged With: 4VO, Bill DeWees, Dan Friedman, home studio, microphone, Recording, Sound Advice Voiceover From an Audio Engineer's Perspective, VO, voiceover book

  • Page 1
  • Page 2
  • Go to Next Page »

Primary Sidebar

Search Blog

Categories

Want to see how well we work together first? LET’S DO IT!!

Book a Single Session
Book a FREE Meet & Greet

Follow Sound4VO

Dan Friedman Voice Over Coach & Demo Producer Tiktok

Tip Jar

Have questions on anything related to voiceover? Dan is available for email consultations at no charge. Ask away! If he's able to help you with your problem, tips are greatly appreciated... Use the "tip jar" below to show Dan the love!

Dan Friedman Voice Over Coach & Demo Producer Tiktok

[email protected]

828.551.0891

Dan Friedman Voice Over Coach & Demo Producer Zen and the art of Voiceover Audiobook Cover Img
Buy Now
Dan Friedman Voice Over Coach & Demo Producer Sound Advice Cover Img
Buy Now

RLM CERTIFIED MASTER COACH Since 2021

Dan Friedman Voice Over Coach & Demo Producer RLMC Logo

©2025 Dan Friedman Sound4VO // Voice Over Site by Voice Actor Websites

MENU
  • Home
  • About
  • Demos
  • Coaching4VO
  • Books
  • Services
  • Testimonials
  • Sound4VO Blog
  • Merch
  • Contact