Dan Friedman
Voice Over Coach & Demo Producer
828.551.0891
[email protected]
  • Home
  • About
  • Demos
  • Coaching4VO
  • Books
  • Services
  • Testimonials
  • Sound4VO Blog
  • Merch
  • Contact

Studio & Gear

Voiceover – The New Catalog is Here!

February 24, 2015 by Dan Friedman

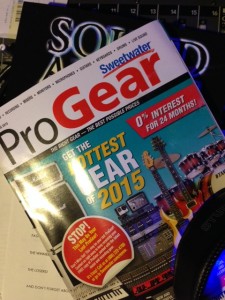
IMG_1791Other than checks and gifts there are few things that we in the voiceover industry receive in the mail that are quite as exciting as the ProGear catalog from Sweetwater. While I have made purchases with many retailers over the years, none of them offers a catalog quite as alluring as Sweetwater. The ProGear catalog is filled with plenty of photos and some really helpful tips on how to get the most out of the gear in your studio. The tech tips and Q&A interviews scattered throughout are worth much more than the weight they add to the catalog … and allow me to say that I don’t just get it for the pictures. 😉

(This year the Victoria’s Secret catalog arrived in my mail on the same day as the Sweetwater catalog. I scanned it thoroughly … twice … and found no helpful articles.)

If you are buying studio gear for the first time, want to upgrade and get the most bang for your buck, or simply have no interest in becoming a “techy,” then even the Sweetwater catalog (as sexy as it is … ahem, I mean informative) can be somewhat overwhelming. You just can’t try everything before you buy. So, how do you choose?

Just as we interpret scripts for meaning and subtext, we also have to interpret descriptions of the gear. For instance, if a microphone has a description that includes “vintage sound” that microphone probably has some characteristics that are noticeable or recognizable. This should probably be interpreted to mean that the microphone, although it may sound spectacular on many sources, may not capture our voice as purely as we would prefer. The microphone will have its own sonic character. A description that includes “accuracy” or “clean and clear” may be the better choice.

A microphone’s description may include the acronym “SPL” (Sound Pressure Level). This means the loudness level (or volume) of the source sound (e.g. – your voice). While we are not necessarily shouting, we may be close to the microphone for intimate reads. As such, the microphone may still be receiving a fairly significant amount of sound pressure level at close proximity. A microphone’s ability to handle high SPLs without distortion is important to us as voiceover artists.

The descriptions included with interfaces and preamps are filled with hyperbole. Once again, terms such as “accurate” and “clean” will be words to look for. Many of us work with multiple DAWs (Digital Audio Workstations) and travel with our gear, therefore “flexibility” and “portability” are terms to watch for as well. Preamps/Interfaces are easy to return or exchange if they don’t offer the level of quality you are hoping for. (Due to health concerns, exchanging microphones can be a bit more complicated. Be sure to check with your retailer regarding their return policies). Furthermore, you will often find another similarly priced preamp/interface from another manufacturer that will.

Truth be told, if you were recording an instrument with a broad range of frequencies such as a piano or recording an entire orchestra, the overall ability of your interface to capture those sounds would be critical. Your voice takes up much less sonic space. At the low end of the price spectrum you will not notice too many differences in an interface’s ability to capture sound (or differences listed in the catalog). However, there are a few areas where you will notice significant differences. One of the things that separates good quality gear from gear that is barely acceptable (or not at all acceptable in my opinion) is the sensitivity of the knobs. Small changes to the preamp on a physical knob should not cause dramatic jumps in signal level (up or down). Level changes should be as smooth as the knob you are turning essenceapotek. Another difference is headroom, or the ability of the preamp to produce an adequate signal level while still allowing you to increase the gain should you need it. Other critical differences are self-noise and the software and interface options they may or may not offer.

For studio monitors it is important to remember that you are working primarily with your voice. Therefore it isn’t necessary to have features such as “extended bass response.” Be sure to pay attention to whether the studio monitors are “powered” or “active.” This means they have their own amplifiers built into the speaker enclosure. Remember, the size of your listening environment will help determine what size studio monitors will best meet your needs. If you are going to be using your speakers in a small space, then “nearfield” monitors are the way to go.

Just like with studio monitors, headphones may offer a number of features you simply do not need when working with voice alone. However, there are some features you will definitely want to consider. A closed back design is one of those must-have features. This design helps reduce the possibility of sound being emitted by your headphones from leaking into your microphone. Headphone bleed is a sound you do not want to have to try to edit out of your recordings later. You’ll also want to be certain that the headphones you choose are comfortable as you may be wearing them for an extended period of time.

Hopefully, some of what I’ve shared here will start you on the right path. Clearly, every description is intended to influence you to buy. We can do our best to interpret greater meaning within these descriptions, but in the end, it will always come back to listening for yourself. Above all else, no matter what piece of gear you choose or which retailer you choose to purchase from, there is no substitute for a stellar performance and a great sounding recording environment.

Thank you Sweetwater for producing a catalog that is loved by everyone in our industry!
Filed Under: Studio & Gear Tagged With: 4VO, Dan Friedman, home studio, ProGear, Recording, Room acoustics, Sound Advice Voiceover From an Audio Engineer's Perspective, sound4vo, Sweetwater, VO, voiceover, voiceover book, voiceover recording, voiceover talent

Voiceover- A Challenge for You!

November 6, 2014 by Dan Friedman

logo 4voDo you know how you really sound? One of the best advantages to working on both sides of the glass is that I have had the opportunity to hear many different voiceover talent, often on the same auditions. I get a chance to hear everyone’s approach (you may be surprised at just how similar these can be) and I get the opportunity to hear everyone’s studios. Naturally, with the abundance of choices in studio gear and everyone working in different studio environments, the quality from one studio to another can be dramatically different. Do you know how your studio stacks up against the others?
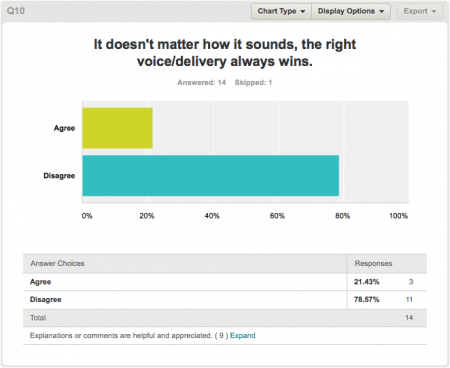
How do you sound compared to everyone else? Is your sound as good or better than your competition? Is it worse? If all things were equal with vocal quality, approach and performance, would better sound quality win the job? I posed the following statement to several agents, coaches and production houses; “It doesn’t matter how it sounds, the right voice/delivery always wins.” The majority disagreed. In other words, sound quality does matter.
Screen shot 2013-04-09 at 3.18.03 PM

No matter what gear you choose and use, in the end, what matters is how you really sound using that gear in your recording environment. The only way to know how your sound and studio quality stack up against your competition is to compare your sound to others. Attempting to do this by listening over the radio or television is not a valid option. There is far too much processing in the mix and in the broadcast signal chain to get a true sense of how your sound compares. Listening to Weekend Workouts on Voicebank can provide you with some insight, but you can’t know what everyone has done to their audio before submitting.

I want you to sound your best. So, I’m proposing this challenge to you. Contact six people in your voiceover circles (more if you like). Each of you record a few lines… about 20 seconds worth should be perfect. Record with good levels averaging between -12 and -6db. Achieve these levels using only your voice, microphone, preamp/interface and DAW. Do not add any processing. Export to 44.1kHz/16bit WAV or AIFF files. Share the audio files among the six of you and listen to how everyone’s sound compares.

Ask yourself; what do I hear? Notice the details in the “ess” sounds. Listen for plosives on “p”, “t”, and “f’s” Listen for noise from the gear or from the room. Is the overall sound too muddy, too thin or just right? Does it sound gritty or silky? Does your voice sound forward and present or restrained and distant? If you had to rate everyone’s sound quality and place them in order, who would be at the top?

Anything measured… improves. You are not out there auditioning all alone, and with the competition greater than ever, you need every advantage you can get! Go ahead and give it a try. You’ll not only be helping yourself, but your voiceover friends too (which is a really cool thing to do). If you do, be sure to comment here on your results. I’d love to hear about it. Good luck!

Filed Under: Studio & Gear Tagged With: 4VO, Dan Friedman, home recording studio, studio acoustics, VO, voiceover, voiceover book

Voiceover – What I Took With Me On My Summer Vacation

August 25, 2014 by Dan Friedman

I spent quite a bit of time relaxing and enjoying the beautiful weather we had this summer. For me the highlights were seeing Steely Dan at the Biltmore Estate (they were incredible) and I also spent a week out on the beach at Ocracoke Island in the Outer Banks of North Carolina. This was the first time I had ever been to a beach outside of the beaches in Florida. Ocracoke was pristine and beautiful. We brought our two kids, our dog and (since they were too young to stay home by themselves) our two new kittens along with us. I’m sure we looked like the Beverly Hillbillies driving the nine hour drive to and from the beach. The car was jam packed!

Ocracoke SunsetHowever, the voiceover business doesn’t stop when we go on vacation. So naturally, I had to leave some room in the car for a travel rig so that I could continue to do auditions and, yes, do a couple of jobs that came in during the week. Since returning, I have seen several posts in social media, and received a few inquiries regarding a travel recording setup. So today, I’m sharing my list of gear with you. This setup worked well for me and I received excellent feedback from my clients on the sound quality. The following is what I brought along. Nearly all of it fit into my computer bag.
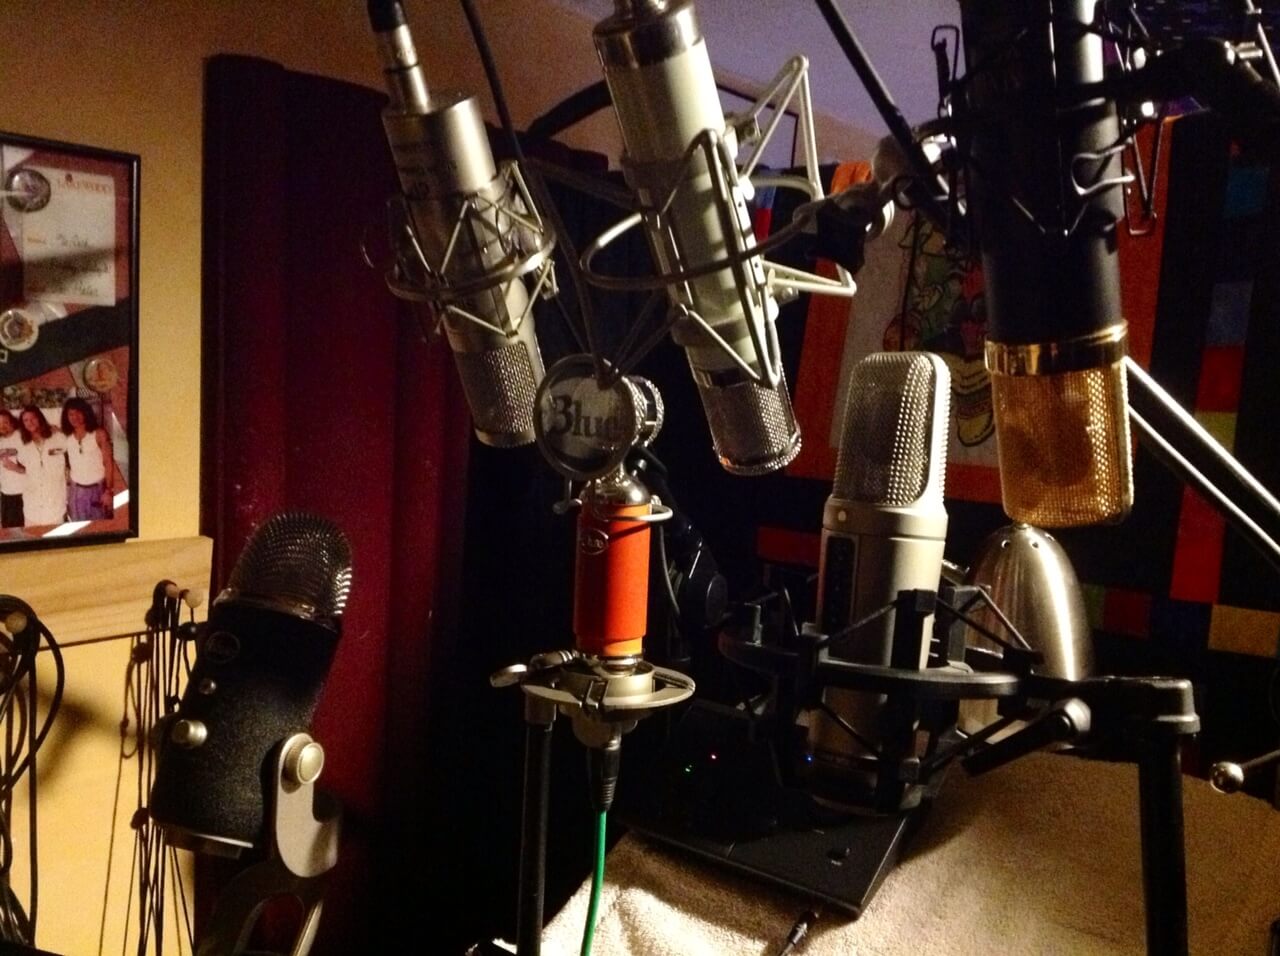
My microphone – The Sennheiser 416. It’s lightweight, offers excellent rejection of the surrounding environment and is very sturdy. The 416 has become my go to microphone in my regular studio setup as well. This is helpful as using the same microphone presents one less variable in my overall sound whether I am in the studio or on the road.

My preamp/interface – The Centrance MicPortPro. It is very compact and the preamp offers plenty of headroom and low self-noise. I placed the windsock on the microphone (eliminating the need to also bring a pop-screen) and placed the mic and the MPP inside the Sennheiser mic case for easy travel.
Ocracoke Lighthouse

My recording device – I brought my MacBook Pro and my iPad. I travel with both. Yes, this is heavier and takes up a bit more space, but editing is much easier on the laptop and the iPad is much more useful for viewing scripts.

A ProLine PLDMS1 mic stand. This little stand is quite sturdy. It folds up easily and fits in a computer bag. The only drawback to this stand is that the mic clip adaptor screws on really tight without much effort. It required pliers to remove it. This was annoying, but not a show-stopper.

Because you can never be too prepared, as a backup to all of this, I brought along my Apogee MiC.

A packing/moving blanket. I needed something to use while laying out on the beach! Actually, I did my recording from the back seat of my car. Modern cars can be quite effective as emergency vocal booths. I used the packing blanket to throw over the two front seats giving me increased isolation from the large front window and thus less sound reflecting off of the glass. Yes, I could have also used it as a beach blanket.

The most important item was one that was already provided… high-speed internet. This is a must for sending and receiving files. Also, while it wasn’t necessary on this trip, with high-speed internet access I could have used ipDTL or Source Connect Now.

So, there you have it… my travel setup. Keep in mind, everyone’s sound and situation are different. What worked well for me may not be the perfect setup for you. In other words, whether you are in your studio or out on the road…  your mileage may vary. 😉

I hope you have had a fantastic summer! What do you bring out on the road?

Filed Under: Studio & Gear Tagged With: 4VO, Dan Friedman, MicPortPro, Sennheiser, sound4vo, VO, voiceover, voiceover book, voiceover travel gear

Voiceover – Microphones Compared: Neumann U87 vs. TLM103

June 23, 2014 by Dan Friedman

As a voice over talent, choosing a microphone is one of the most important career decisions you will ever have to make. After all, you should consider your microphone to be an extension of your voice, personality, character and sound. Many voiceover artists breaking into the industry, as well as those with years of experience call me for advice on what equipment to buy for their home studios. When it comes to microphones the Neumann TLM103 is a top choice.

Neumann microphones are used in recording studios throughout the world for their superior sound and versatility. The Neumann U87 has been an industry standard in the voice over field for many years and more recently, the TLM103 has risen to prominence. This article will discuss both of these microphones and explain why the TLM103 is our microphone of choice for voiceover work.

The U87 and the TLM103 are both great sounding microphones but we recommend the TLM103 for several reasons. First, the TLM103 has virtually undetectable self-noise. At the time it was first released the TLM103 had the lowest self-noise available of any large diaphragm condenser microphone. Second the TLM103 is capable of handling high sound pressure levels. This allows the voice talent to get up close and personal with the microphone at one moment, than stand back and shout out that great car deal or promote an upcoming drag race the next. Thanks to its ability to handle an SPL of 138db the microphone can do all of this with a low risk of distortion. The TLM103 has a high frequency rise that begins just a bit lower in the frequency range than the rise in the U87. This rise, beginning just above 4000 Hz, gives the voice just a little extra edge by comparison to the U87’s rise (which begins at 5000 Hz), allowing the voice to cut through the clutter more easily and before any equalization is applied.

The U87 offers more choices including 3 different polar patterns (Omni-directional, cardioid, and figure8), a -10db attenuation switch, as well as a bass roll off switch. While the multiple polar patterns are useful in the music industry, rarely are they needed for voice overs. In the past, recording sessions involving multiple voice talents (where the figure 8 and Omni-directional patterns may have been necessary) would have been done in one room with everyone standing around one microphone. Today most sessions involving multiple voice talents are held with each individual in their own room, often in locations across the country or even around the world. This eliminates the need for multiple polar patterns.

The attenuation switch on the U87, when engaged, does (in my opinion) alter the sound of the microphone somewhat. Furthermore the TLM103’s ability to handle a higher sound pressure level (138db vs. 127db on the U87 with the pad engaged) negates the usefulness of the pad when comparing the two microphones.  The bass roll off switch can be a useful feature, but is rarely an absolute necessity.

The capsule in the TLM103 is based on the design of the capsule in the U87 so they are similar in overall sound quality and performance. However, with the reduced (yet unnecessary for voiceover) feature set the TLM103 costs less, which is the final reason the TLM103 is recommended over the U87.

The TLM103’s lower self noise, its ability to handle higher SPL, its similarities and slight (yet pleasing) differences to the U87 and its lower cost  make it the “microphone of choice”. Both of these microphones are industry standards for a reason and both can reproduce sound clearly and accurately. In fact they are so accurate that the biggest criticism of both of these microphones is that they tend to lack character. This criticism comes largely from the music world; however this is hardly a criticism, because in the voiceover world the “character” should come from you, the voice over talent, and not the microphone.

Filed Under: Studio & Gear

Choosing a Voiceover Microphone

May 1, 2013 by Dan Friedman

By Dan Friedman Choosing a Voiceover Microphone.
As a voiceover artist, it is critical that you choose the right microphone for your voice, your room and your budget. When it comes to determining which microphone is right for you, there is only one good way to go about making this very important decision.

Before buying anything, YOU MUST LISTEN AND COMPARE FOR YOURSELF.

Typically, when voice talent begin their career or begin to invest in a home studio they choose a microphone based on one or more of the following: advice from friends or associates, familiarity with something they’ve used previously (perhaps an Electro-Voice RE20 from a radio station), what the sales person at the music store sells to them, or what they can afford. Although all of these factors should be taken into consideration, they serve as merely a starting point.

The advice of others is helpful, but how good something sounds to one person (or on one person’s voice) may not be as good for someone else. The best way to use the advice of others is to list all of the microphones they mention as possible options. For those who have had experience in broadcast, it is important to note that although those RE20’s and Shure SM7’s are great in radio stations for their sound and their durability, they are not necessarily the best choice for voice overs.

Of course the advice of a salesperson should always be “taken with a grain of salt”. They may be very knowledgeable, but they may also be getting incentives to sell you something that just isn’t right for your needs or your voice. Lastly, it is understandable that everyone wants to save money, but consider two things:

  1. Since this is your career, you want to sound your absolute best, and sounding your best should help you pay for your investment.
  2. If you do the research, you can still find the best microphone for you and your current situation.

The best advice will most likely come from the engineers you work most closely with. Engineers in the voice over industry often have the benefit of hearing many different microphones on many different voices. Not only do they know what they like, but they may also know your voice and the sound of your room well enough to know which microphones will work best for you.  Also, if you are working with them closely already it may mean that you are already earning money with them and that is the best reason to seek their advice and make a decision that will help keep them happy with your sound. But even with all of that being said…

Nothing can replace the experience of actually testing several microphones and listening to the myriad of choices and sounds that different microphones offer. It is truly an ear opening experience.

It should be noted that there are several microphones that are considered voice over industry standards and the only reasons to not choose one of them are: 1) if you absolutely can not afford them or 2) if they do not sound as good on your voice as something else. For voiceovers or voice acting, the Neumann U87, TLM 103 and Sennheiser 416 are industry standards because of their well known characteristics and sound quality. Therefore, engineers and producers generally prefer to work with these microphones.

If you either can not afford one of these microphones or they are just not working well for you, here is a plan that should help you find the best microphone for you and your situation. As a general rule, a large diaphragm condenser microphone will likely be the most appropriate choice as a voice over microphone. There is an enormous selection of LDC microphones available and they range in price from below $100 to up into the thousands of dollars.

Begin by making a list of microphones, and noting which ones fit your budget. Include at least one industry standard microphone (you will use this to compare others against). Start your list with all of the microphones that have been suggested to you. Read through descriptions of other microphones in music store catalogs, websites, industry blogs and forums. If you are serious about your career, you will not limit yourself to just the cheap ones. Remember, the idea is to find the best microphone for you and although you may not be able to afford “the best one” now, you will at least know what that is and may be able to get it later. Make no mistake, among inexpensive microphones there are some great values available and one may even be perfect for you.

If you are reading the specifications for microphones (and you should be) look for words and phrases such as: high signal to noise ratio or low noise, capable of withstanding high sound pressure levels or SPL, wide dynamic range, sonic clarity and transparent signal.

Note whether a particular model is generally used for vocals or instruments. Also pay attention to what accessories may be included in the price.

I strongly suggest using a shockmount. A shockmount is a “basket” that holds a microphone. It is designed to help eliminate vibrations that can reach the microphone through the microphone stand. Some microphones include a shockmount, for others it must be purchased separately.

After you’ve done your research, have made a list of microphones that interest you and that fit your budget, it is time to visit a music store with a pro audio department. Even if the nearest one is far away, it would be worth making the trip. This is your sound and your career we are talking about!

Bring along at least 3 scripts. Bring a high energy script that requires you to push your voice a bit, bring a script that matches the style you perform the most and bring a script that requires a close and intimate read. You may also consider including a script that contains several hard consonants such as “t” or “p”. When you get to the store let a salesperson know that you would like to test and compare some microphones. You will need to be setup with a mixer, a microphone cable and some headphones. Of course if you already have headphones that you are familiar with you should bring your own. If you can find a quiet area within the store, it would be best if you can use that space for your tests.

Ask for one of the industry standard microphones – you will want to keep this around to refer back to as you try others. Using the same exact audio chain and settings begin testing your reads through each of the microphones on your list (remember to turn the phantom power off and back on as needed when switching microphones). For this test you will want to have your headphones reasonably loud, but not so loud that they damage your ears. The idea is to listen closely to the nuances in the microphone. Do not worry about your read.

Use your ears and ask yourself the following questions as you listen. Listen to the high end. Is it crisp and clean or is it smeared?  A “smeared” high end has the sound of being distorted, where “s” seems harsh, brittle and possibly almost painful.  It sounds as though there is just too much of it and the sound doesn’t end cleanly. Is there not enough in the high end? Does your “s” seem to disappear or sound dull? Listen to the midrange. Is your voice coming through clearly as you know it, or does it sound affected? Does it sound a bit like it is coming through a telephone or a megaphone? Is the midrange seemingly harsh or is it seemingly dull or distant. Ideally, it should sound…the way you really sound. Listen to the low end. Particularly if you are a deep baritone, pay attention to how the deepest part of your voice is translating. The low end can be distorted in much the same way “s” can be distorted in the highs, except the lows will sound too thick or “muddy”.

How are the “t” and “p” consonants coming out? Is the microphone popping easily on these consonants? How does the microphone react when you change your proximity to it? Listen closely for all of the details and ask yourself each of those questions. Compare your favorites to each other and to the standards (remember that it is perfectly fine if one of the standards is your favorite). Ask a friend or someone in the store for their thoughts on the sound. Choose the one that sounds best. If you can’t decide which one sounds best, go with the one that sounds the most similar to one of the industry standards.

Once you make your choice, bring it home and try it out in your own studio. Be sure that it still sounds as good to you at home as it did in the store. Remember that your microphone captures the sound of your environment as well as your voice and it may become evident that some changes to your room are necessary… but that is for another article.

Whether you are just starting out or are a seasoned voice over professional this process should be fun as well as informative. Best of all, after you’ve gone through the process and made your decision you will have confidence knowing that you made the best choice for you, your voice and your budget.

Filed Under: Studio & Gear Tagged With: 4VO, microphone, Sound Advice Voiceover From an Audio Engineer's Perspective, sound4vo, VO, Voicebank, voiceover

The Anatomy of Three Voiceover Home Studios Part 3

April 4, 2013 by Dan Friedman

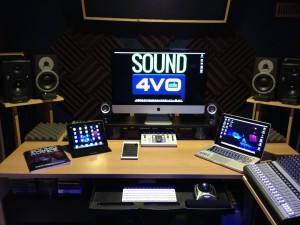
SOUND4VOStudio It is as simple as this… if you want to work in voiceover, you need a home studio. I know it seems hard to believe, but it is true; the days of being chauffeured around from studio to studio where you talk for a few minutes and line your pockets with cash are long gone… and have been for years. More recently, the need for racks filled with expensive magic audio boxes has also become unnecessary. Today, with nothing more than a USB microphone and an iPad, you can be recording high quality audio in no time. Well… sort of.

In this final installment, of the three part series(part 1) (part 2), I’ll discuss a third type of voiceover recording setup. In this setup… the sky is the limit! Keep in mind, that in any recording setup, there are at least two common denominators that will remain constant. They are, and always will be, the two most important factors in your sound and your success… you and the space in which you record. The cheapest setup can sound great (or at the very least… useable) with an amazing talent, performing in a great sounding space. A great performance on expensive equipment can be useless in a noisy or terrible sounding space.

With that in mind, let’s checkout setup number three.

Voiceover Recording Setup 3

While setup 1 and setup 2 are portable, portability was never the goal. Consistency from one session to the next is a critical element to success in voiceover. Therefore, remaining in one space is preferred. Recording setup 3 is stationary, and there are other big changes that will have you prepared for anything. One of the biggest changes is incorporating a mixer into the setup, which will allow you to include phone patch and (when you are ready and if the technology is available where you are geographically) an ISDN codec.

I could very easily have added them to the other two setups but with setup 3, the other big change is the necessity for studio monitors (speakers). Nobody should be listening critically to audio on headphones alone. Headphones, by design, do not give you a true picture of how we hear sound in the real world. We hear with both of our ears in combination, not with the left and right sides in isolation. Studio monitors are a personal preference. Whichever monitors you choose, you should give yourself some time to get familiar with their characteristics. More importantly, they should be comfortable for you to listen on over long periods of time.

Most components listed in setup 2 will remain the same for this setup. Instead of a laptop, a desktop computer will serve as the focal point for this studio. This will likely increase your storage capacity and speed. It will also give you more visual real estate due to a bigger computer monitor (the screen) and you can get even more real estate by adding an additional monitor.

With this setup, the sky is the limit when it comes to options, components and prices. Upgrades are possible in all areas of your audio chain. While the $300 microphone may still be perfect for you, it may be worthwhile to explore more expensive options. The same is true for your preamp, interface, cables and… well… everything. The price ranges I’ve listed below, now reflect the cost of higher priced equipment that can be found in many home voiceover studios.

Overall estimated cost:

High quality desktop computer w/OS and basic software – $1500 – $3000
DAW – $0 – $1800 (Audacity and “lite” DAW software = $0, full versions = $1800)
Separate Preamp – $500 – $2500
USB/Firewire Preamp or standalone AD/DA Converter – $150 – $2500
Mixer – $100 – $1000
Standard (XLR) LDC microphone – $300 – $1200
ISDN Codec or Source Connect Pro Software – $1000 – $3000
Phone patch – $175 – $500
Headphones – $100
Studio Monitors – $300 – $1600
Cables/adaptors – $50 – $200
Heavy duty microphone stand w/boom – $150

Setup 3 cost = aprox. $4325 – $17,550

Your home studio. For just over $1000, which was discussed in part one of this series, all the way up to over $17,000 (and beyond) you can be recording, editing and producing voiceovers. Note that these costs don’t take into consideration acoustic treatment or sound proofing (the prices for Whisper Rooms, for example, begin at just over $3000). Furthermore, if you’re interested in doing full production and mixing, you’ll need music, sound effects and audio processing plugins to go along with your DAW software.

Some of the items listed can be combined and many of the items are transferable from setup to setup, allowing your studio to build upon itself and grow with your career. Also, it is more likely that setup 1 could be the last setup you buy rather than your first. The portable studio is far more useful to voice talent who’ve been working at this awhile and are in higher demand.

So, now that you’ve gotten your studio budget figured out… start working on your budget for coaching, marketing materials, website, travel to industry events and your very own… chauffeured limousine. 😉

Filed Under: Studio & Gear Tagged With: Dan Friedman, home studio, sound4vo, voiceover, voiceover book, voiceover recording

  • Page 1
  • Page 2
  • Page 3
  • Interim pages omitted …
  • Page 5
  • Go to Next Page »

Primary Sidebar

Search Blog

Categories

Want to see how well we work together first? LET’S DO IT!!

Book a Single Session
Book a FREE Meet & Greet

Follow Sound4VO

Dan Friedman Voice Over Coach & Demo Producer Tiktok

Tip Jar

Have questions on anything related to voiceover? Dan is available for email consultations at no charge. Ask away! If he's able to help you with your problem, tips are greatly appreciated... Use the "tip jar" below to show Dan the love!

Dan Friedman Voice Over Coach & Demo Producer Tiktok

[email protected]

828.551.0891

Dan Friedman Voice Over Coach & Demo Producer Zen and the art of Voiceover Audiobook Cover Img
Buy Now
Dan Friedman Voice Over Coach & Demo Producer Sound Advice Cover Img
Buy Now

RLM CERTIFIED MASTER COACH Since 2021

Dan Friedman Voice Over Coach & Demo Producer RLMC Logo

©2025 Dan Friedman Sound4VO // Voice Over Site by Voice Actor Websites

MENU
  • Home
  • About
  • Demos
  • Coaching4VO
  • Books
  • Services
  • Testimonials
  • Sound4VO Blog
  • Merch
  • Contact